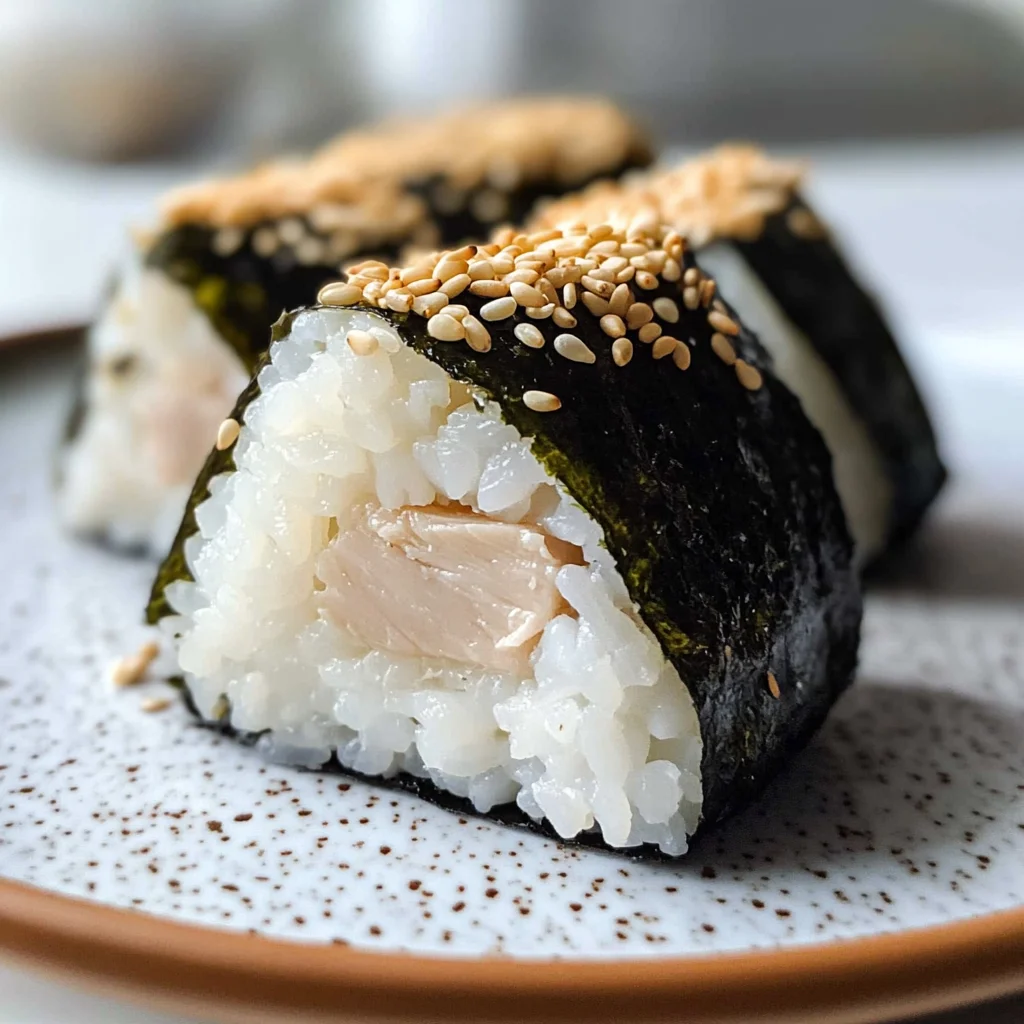
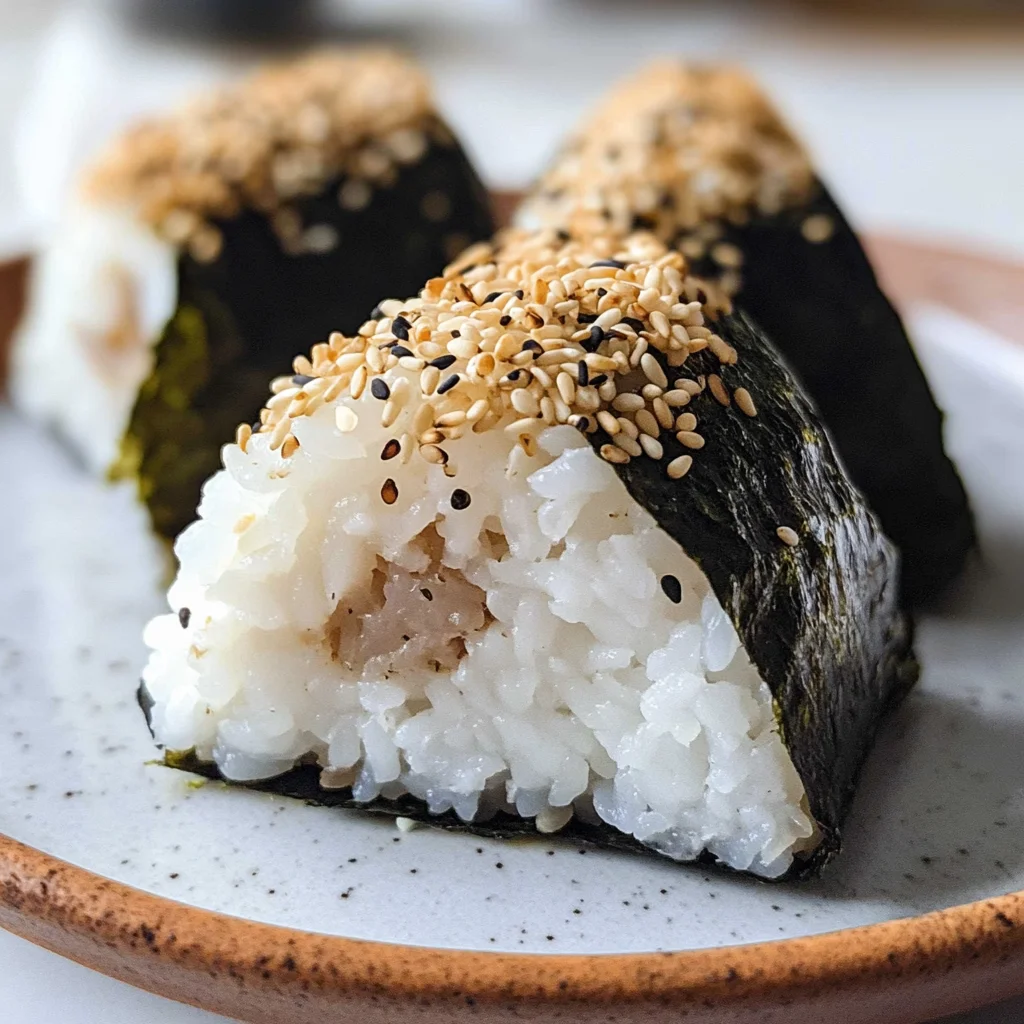
A quick and delightful treat, 15-min. Easy Japanese Tuna Onigiri is perfect for any occasion. These delicious rice balls are filled with a creamy tuna and mayo mixture and wrapped in crispy nori, making them an ideal snack, lunchbox item, or picnic food. With just six ingredients and a preparation time of only 15 minutes, you can enjoy these flavorful bites whenever the craving strikes.

Jump to:
- Why You’ll Love This Recipe
- Tools and Preparation
- Essential Tools and Equipment
- Importance of Each Tool
- Ingredients
- For the Onigiri
- How to Make 15-min. Easy Japanese Tuna Onigiri
- Step 1: Prepare the Rice
- Step 2: Prepare the Tuna Filling
- Step 3: Prepare the Nori Sheets
- Step 4: Shape the Rice Balls
- Step 5: Form Each Onigiri
- Step 6: Wrap and Garnish
- How to Serve 15-min. Easy Japanese Tuna Onigiri
- As a Breakfast Option
- For Lunchboxes
- Snack Time Treats
- At Picnics
- How to Perfect 15-min. Easy Japanese Tuna Onigiri
- Best Side Dishes for 15-min. Easy Japanese Tuna Onigiri
- Common Mistakes to Avoid
- Storage & Reheating Instructions
- Refrigerator Storage
- Freezing 15-min. Easy Japanese Tuna Onigiri
- Reheating 15-min. Easy Japanese Tuna Onigiri
- Frequently Asked Questions
- Can I use brown rice instead of short grain?
- Is it possible to make this recipe vegetarian?
- How do I customize my tuna filling?
- Can I use other types of fish?
- How do I prevent my onigiri from falling apart?
- Final Thoughts
- 📖 Recipe Card
Why You’ll Love This Recipe
- Quick Preparation: Ready in just 15 minutes, this recipe is perfect for busy days or last-minute meals.
- Simple Ingredients: Made with only six basic ingredients that you might already have at home.
- Versatile Meal Option: Great for breakfast, lunch, or as a snack; these onigiri fit any meal plan.
- Customizable Flavors: Feel free to adjust the filling to suit your taste—add vegetables or spices for extra flavor!
- Portable and Fun: Easy to pack for on-the-go meals; they make a fun addition to picnics or lunchboxes.
Tools and Preparation
Making this easy onigiri doesn’t require fancy equipment—just a few essential tools to help you along the way.
Essential Tools and Equipment
- Rice cooker or pot
- Large bowl
- Fine sieve
- Rice paddle
- Plastic wrap or onigiri mold (optional)
Importance of Each Tool
- Rice cooker or pot: Ensures perfectly cooked short-grain rice, which is crucial for forming sticky rice balls.
- Fine sieve: Helps remove excess liquid from the canned tuna, keeping your filling from getting soggy.
- Rice paddle: Makes it easy to mix and season rice without damaging the grains.
- Onigiri mold: Optional but helpful for shaping rice balls quickly and uniformly.
Ingredients
To make 15-min. Easy Japanese Tuna Onigiri, gather the following ingredients:
For the Onigiri
- 2 sheets nori (or use 1/2 sheet if you prefer less)
- 1 tsp sesame seeds (for garnishing, optional)
- 2 cups cooked short grain rice (if you’re making fresh rice, see Notes below)
- 1/2 tsp salt
- 5.29 oz canned tuna (in oil recommended, or canned tuna in water)
- 2 tbsp Japanese mayo (or regular mayonnaise)
How to Make 15-min. Easy Japanese Tuna Onigiri
Step 1: Prepare the Rice
Transfer hot cooked short-grain rice into a large bowl. Season with salt using a rice paddle. Cover and set aside. If you’re using leftover cold rice, cover it and microwave for 2-3 minutes before seasoning.
Step 2: Prepare the Tuna Filling
Open the can of tuna and strain it using a fine sieve. Press down with a fork to remove as much liquid as possible. Transfer the strained tuna to a small bowl. Mix in Japanese mayo until well combined. Set aside.
Step 3: Prepare the Nori Sheets
Decide how much nori you’d like based on personal preference. If you prefer more dry roasted seaweed, use two nori sheets cut in half for four pieces. For less nori, use half a sheet cut into four equal strips.
Step 4: Shape the Rice Balls
Prepare a bowl of water nearby to dip clean hands in regularly. Take 1/2 cup (100 grams) of cooked rice and place it in your palm. Shape it into a round ball, then flatten it into a pancake about 1/2-inch thick. Make a dent in the center and add about 2 tbsp (30 ml) of tuna mayo mixture.
Step 5: Form Each Onigiri
Fold the rice over the filling while pushing it into the center. Firmly pack it into a ball shape, flattening it to about 1.5 inches thick while shaping it into a triangle. Wet your hands as needed during this process.
Step 6: Wrap and Garnish
Wrap one sheet of nori around the base of each triangle onigiri and press gently to secure it. Repeat until you’ve made all four rice balls. Optionally garnish each piece with sesame seeds before serving immediately!
How to Serve 15-min. Easy Japanese Tuna Onigiri
These delightful rice balls are versatile and can be enjoyed in various ways. Whether it’s breakfast, lunch, or a snack, here are some serving ideas to elevate your onigiri experience.
As a Breakfast Option
- Enjoy warm onigiri with a side of miso soup for a wholesome start to your day.
- Pair with fresh fruit slices like oranges or apples for a refreshing balance.
For Lunchboxes
- Pack onigiri with pickled vegetables for a colorful and nutritious lunch.
- Include edamame or carrots sticks as a crunchy complement.
Snack Time Treats
- Serve with a side of soy sauce or wasabi for an extra flavor kick.
- Pair with seaweed salad for a light and refreshing snack option.
At Picnics
- Wrap individually in parchment paper for easy handling outdoors.
- Combine with some chilled green tea for a refreshing picnic drink.
How to Perfect 15-min. Easy Japanese Tuna Onigiri
Creating the perfect onigiri requires attention to detail. Here are some tips to ensure your rice balls come out great every time.
- Use fresh rice: Freshly cooked rice is sticky and easier to mold, giving your onigiri the perfect texture.
- Moisten your hands: Dipping your hands in water prevents the rice from sticking, making shaping easier.
- Mix well: Ensure the tuna mayo mixture is evenly combined so each bite is consistently flavorful.
- Experiment with shapes: While traditional onigiri is triangular, feel free to shape them into rounds or other fun forms!
- Utilize nori wisely: Wrap the nori just before eating to keep it crisp and prevent it from getting soggy.
Best Side Dishes for 15-min. Easy Japanese Tuna Onigiri
To create a balanced meal, consider pairing these delicious tuna onigiri with complementary side dishes. Here are some great options:
Miso Soup
A warm bowl of miso soup provides comfort and pairs wonderfully with the savory flavors of onigiri.Pickled Vegetables
A selection of pickled vegetables adds tanginess and crunch, enhancing your meal’s overall texture.Edamame
Lightly salted steamed edamame offers protein and makes an excellent finger food alongside the rice balls.Seaweed Salad
This refreshing salad complements the umami flavors of tuna while adding a delightful crunch.Cucumber Slices
Crisp cucumber slices provide a refreshing contrast and can be dipped in soy sauce for added flavor.Fruit Salad
A mix of seasonal fruits balances the savory notes of tuna with sweetness, making it a perfect addition to any meal.
Common Mistakes to Avoid
Making 15-min. Easy Japanese Tuna Onigiri can be simple, but some common mistakes can ruin your experience. Here are some tips to help you succeed.
- Using Cold Rice: Using cold rice can lead to a dry texture. Always ensure your rice is warm and freshly cooked or reheated before shaping.
- Overstuffing the Filling: Adding too much tuna mayo can make it difficult to seal the onigiri. Aim for about 2 tablespoons of filling for each rice ball.
- Not Wetting Hands: Not wetting your hands while shaping can cause rice to stick. Always keep a bowl of water nearby to dampen your hands.
- Skipping Seasoning: Forgetting to season the rice with salt will result in bland onigiri. Make sure to mix in salt to enhance flavor.
- Improper Storage: Storing onigiri improperly can make them dry out or become soggy. Use airtight containers and refrigerate or freeze as needed.
Storage & Reheating Instructions
Refrigerator Storage
- Store in an airtight container for up to 3 days.
- Wrap each onigiri individually with plastic wrap for better freshness.
Freezing 15-min. Easy Japanese Tuna Onigiri
- Freeze for up to 1 month.
- Place onigiri in a single layer on a baking sheet until firm, then transfer them to a freezer-safe bag.
Reheating 15-min. Easy Japanese Tuna Onigiri
- Oven: Preheat to 350°F (175°C) and bake for about 10 minutes until warmed through.
- Microwave: Heat on medium power for about 30-60 seconds, checking frequently.
- Stovetop: Lightly pan-fry in a non-stick skillet over low heat, flipping occasionally until heated.
Frequently Asked Questions
Here are some common questions about making 15-min. Easy Japanese Tuna Onigiri.
Can I use brown rice instead of short grain?
Yes, you can use brown rice, but it may alter the texture and flavor slightly.
Is it possible to make this recipe vegetarian?
Certainly! Substitute canned tuna with mashed avocado or chickpeas mixed with mayonnaise for a vegetarian option.
How do I customize my tuna filling?
You can add chopped green onions, cucumber, or even spicy mayo for extra flavor and crunch.
Can I use other types of fish?
Yes! Feel free to experiment with canned salmon or any other preferred seafood.
How do I prevent my onigiri from falling apart?
Ensure you pack the rice tightly when shaping and keep your hands moist while handling the rice.
Final Thoughts
The 15-min. Easy Japanese Tuna Onigiri is not only quick and simple but also versatile enough for any meal of the day. You can easily customize the filling based on your preferences or dietary needs, making it an enjoyable dish for everyone. Try this delicious recipe today!
Did You Enjoy Making This Recipe? Please rate this recipe with ⭐⭐⭐⭐⭐ or leave a comment.
📖 Recipe Card
Print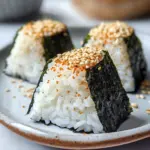
15-min. Easy Japanese Tuna Onigiri
- Total Time: 15 minutes
- Yield: Makes approximately four onigiri 1x
Description
15-min. Easy Japanese Tuna Onigiri is a delightful and quick treat that satisfies your cravings for a savory snack or meal. These flavorful rice balls are filled with a creamy tuna mayo mixture and wrapped in crispy nori, making them perfect for breakfast, lunchboxes, or picnics. With just six simple ingredients and a preparation time of only 15 minutes, you can whip up these delicious bites whenever hunger strikes. Their versatility allows you to customize the filling with your favorite spices or vegetables, ensuring each bite is packed with flavor. Whether enjoyed at home or on the go, these onigiri will quickly become a staple in your kitchen.
Ingredients
- 2 sheets nori (or half sheets)
- 2 cups cooked short grain rice
- 5.29 oz canned tuna (in oil or water)
- 2 tbsp mayonnaise
- 1/2 tsp salt
- Optional: sesame seeds for garnish
Instructions
- Prepare the rice by seasoning hot cooked short-grain rice with salt in a large bowl; set aside.
- Strain the canned tuna using a fine sieve and mix with mayonnaise in a small bowl until well combined.
- Shape rice into flat round balls, creating a dent in the center to add about 2 tablespoons of the tuna mixture.
- Fold and pack the rice around the filling into triangular shapes; wrap with nori and garnish with sesame seeds if desired.
- Serve immediately or store as needed.
- Prep Time: 10 minutes
- Cook Time: 5 minutes
- Category: Snack
- Method: No cooking required after rice is prepared
- Cuisine: Japanese
Nutrition
- Serving Size: 1 onigiri (100g)
- Calories: 157
- Sugar: 0g
- Sodium: 310mg
- Fat: 6g
- Saturated Fat: 1g
- Unsaturated Fat: 4g
- Trans Fat: 0g
- Carbohydrates: 21g
- Fiber: 1g
- Protein: 5g
- Cholesterol: 6mg