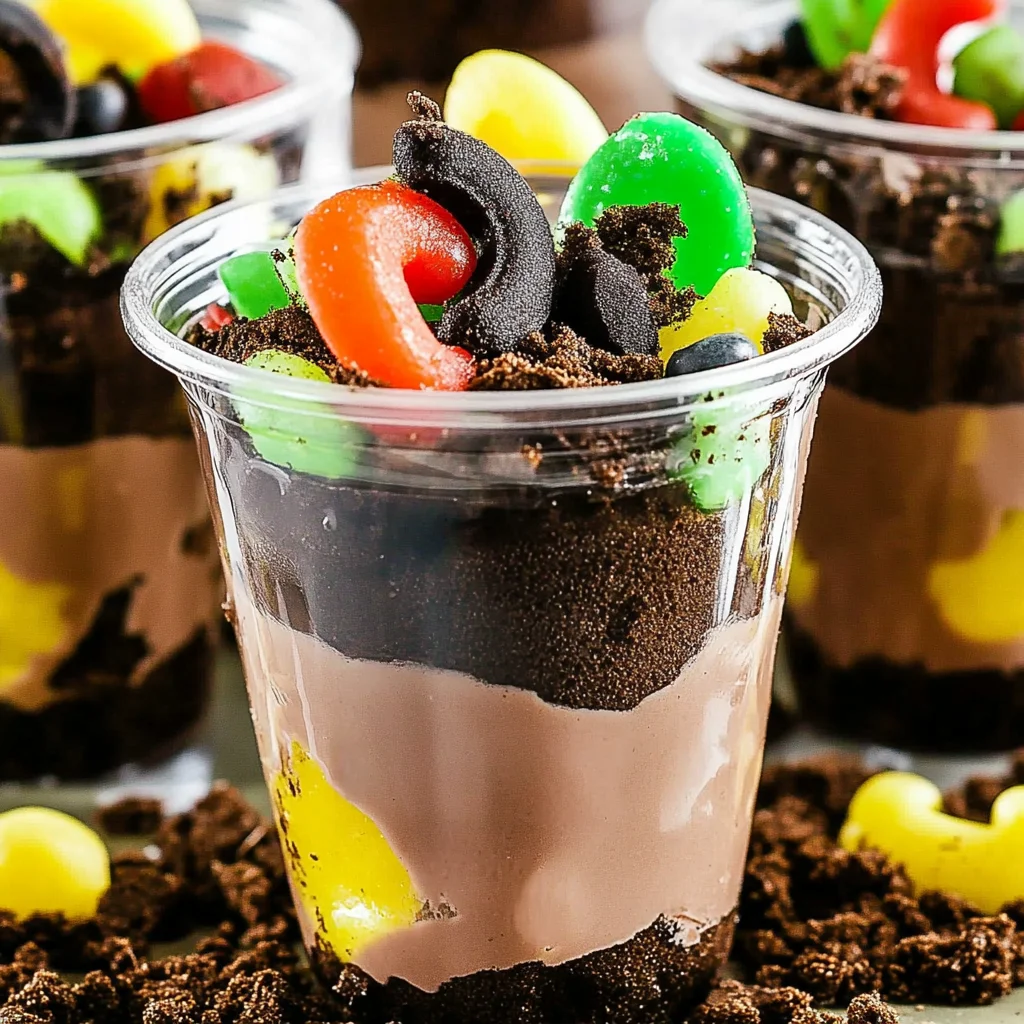
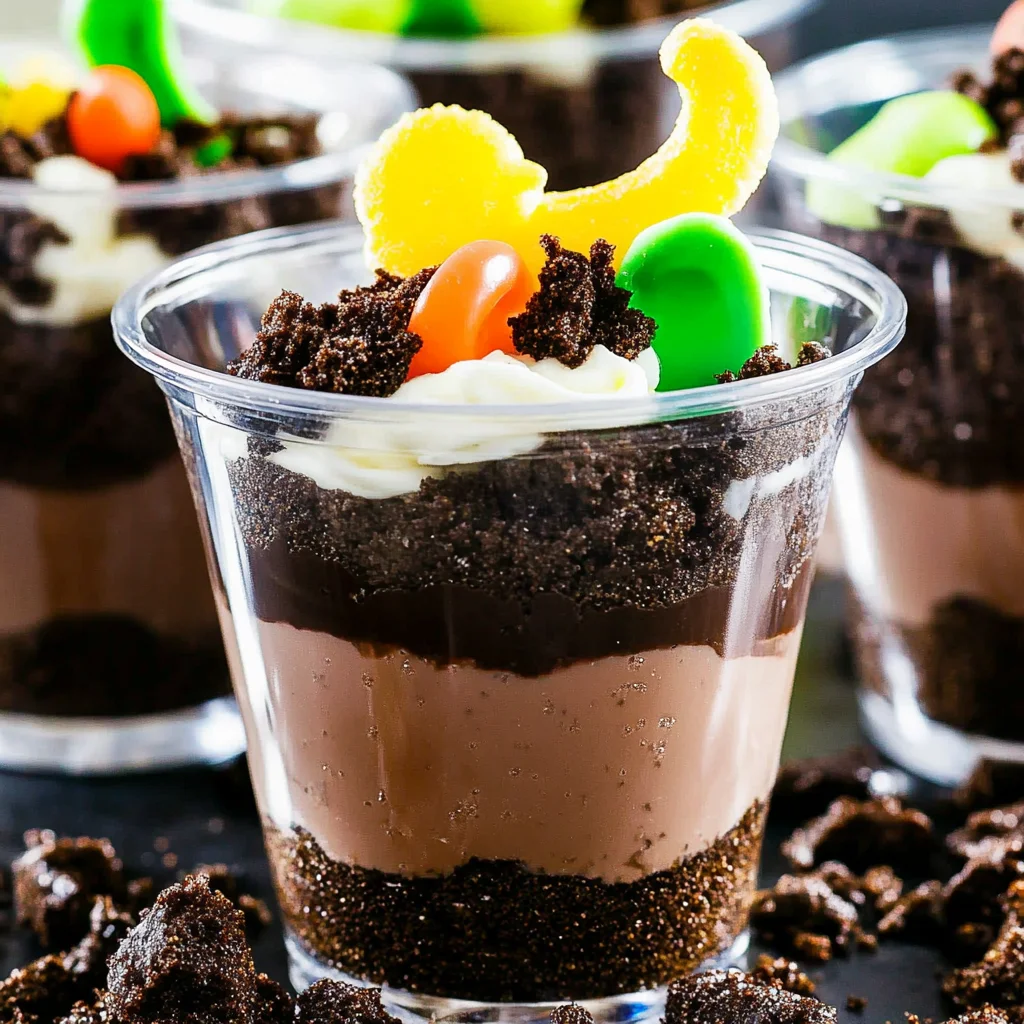
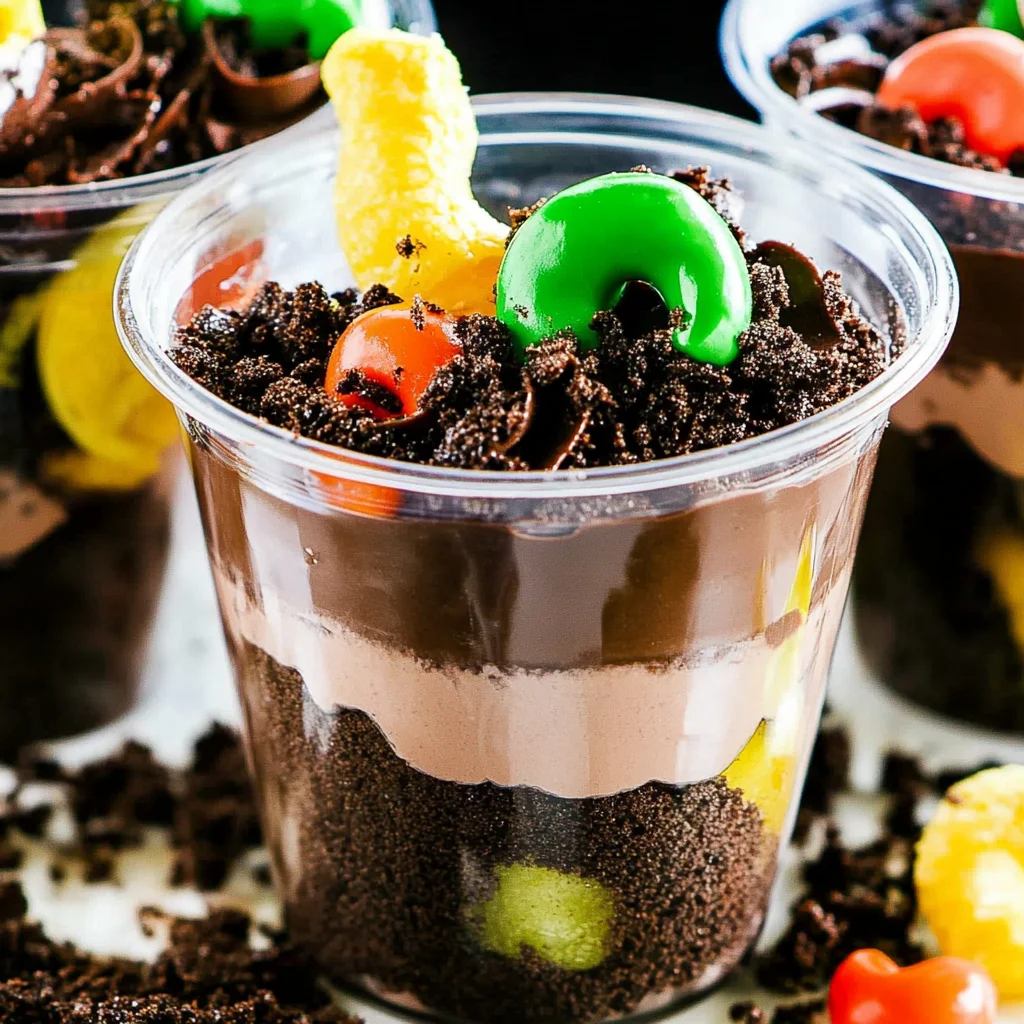
Dirt Cups are a fun, delicious dessert that everyone loves! With layers of rich chocolate pudding, crushed Oreos, and colorful gummy worms, these treats are perfect for parties, kids’ gatherings, or any celebration. Their whimsical presentation and delightful taste make them a standout choice. Plus, they’re easy to assemble, ensuring you can whip up a batch in no time!

Jump to:
- Why You’ll Love This Recipe
- Tools and Preparation
- Essential Tools and Equipment
- Importance of Each Tool
- Ingredients
- For the Pudding Layer
- For the Crunchy Layer
- For Garnish
- How to Make Dirt Cups
- Step 1: Mix the Pudding
- Step 2: Let It Thicken
- Step 3: Fold in Whipped Topping
- Step 4: Assemble in Cups
- Step 5: Add Crushed Oreos
- Step 6: Top with Gummy Worms
- Step 7: Chill and Serve
- How to Serve Dirt Cups
- Individual Cups
- Party Platter
- Themed Events
- DIY Stations
- Kids’ Parties
- How to Perfect Dirt Cups
- Best Side Dishes for Dirt Cups
- Common Mistakes to Avoid
- Refrigerator Storage
- Freezing Dirt Cups
- Reheating Dirt Cups
- Frequently Asked Questions
- What are Dirt Cups?
- Can I customize my Dirt Cups?
- How long do Dirt Cups last?
- Can I use different flavors of pudding?
- Are there any allergy concerns with Dirt Cups?
- Final Thoughts
- 📖 Recipe Card
Why You’ll Love This Recipe
- Quick Preparation: This recipe takes just 10 minutes of active prep time, making it an effortless dessert option.
- Fun Presentation: The layers of chocolate and crushed cookies topped with gummy worms create a visually exciting treat.
- Kid-Friendly: Kids adore Dirt Cups! They are interactive and allow for creative garnishing.
- Versatile: Perfect for various occasions like birthday parties, Halloween celebrations, or casual family dinners.
- Decadent Flavor: The combination of creamy pudding and crunchy Oreos delivers a delightful taste that satisfies dessert cravings.
Tools and Preparation
To create these delightful Dirt Cups, you’ll need some essential tools. Having the right equipment makes the process smoother and more enjoyable.
Essential Tools and Equipment
- Mixing bowl
- Whisk
- Measuring cups
- Serving cups or glasses
- Spoon
Importance of Each Tool
- Mixing bowl: A medium-sized bowl is crucial for combining your ingredients without making a mess.
- Whisk: This tool is essential for thoroughly mixing the pudding mix with milk to achieve a smooth texture.
- Measuring cups: Accurate measurements ensure the right balance of flavors in your Dirt Cups.
Ingredients
Layers of chocolate pudding, crushed Oreos topped with gummy worms!
For the Pudding Layer
- 3.4 ounces box instant chocolate pudding mix
- 2 cups milk
- 8 ounces whipped topping (thawed)
For the Crunchy Layer
- 10-12 Oreo cookies (crushed)
For Garnish
- 32 gummy worms
How to Make Dirt Cups
Step 1: Mix the Pudding
In a medium bowl, add cold milk and sprinkle the pudding mix over the top. Whisk until well combined.
Step 2: Let It Thicken
Allow the mixture to sit for about 5 minutes so it can thicken properly.
Step 3: Fold in Whipped Topping
Gently fold in the thawed whipped topping until everything is mixed well. This will create a light and airy texture.
Step 4: Assemble in Cups
Spoon your pudding mixture into serving glasses or cups until they are nearly full.
Step 5: Add Crushed Oreos
Sprinkle crushed Oreo cookies on top of each pudding layer in the cups to create a delicious crunch.
Step 6: Top with Gummy Worms
Place four gummy worms on top of each cup as a fun decoration.
Step 7: Chill and Serve
Chill your Dirt Cups in the refrigerator until ready to serve. Enjoy this sweet treat with family and friends!
How to Serve Dirt Cups
Dirt Cups are a fun and creative dessert that can be served in various ways. Whether for a party, a family gathering, or even a themed event, these delightful treats can be customized to enhance your presentation and enjoyment.
Individual Cups
- Serve each Dirt Cup in clear plastic cups to showcase the layers of pudding and crushed Oreos. This makes them visually appealing and easy to handle.
Party Platter
- Arrange multiple Dirt Cups on a large platter, garnished with extra gummy worms. This allows guests to help themselves and adds a festive touch to your dessert table.
Themed Events
- For Halloween, add spooky decorations like edible eyeballs or candy spiders on top of the Dirt Cups. This will make them a hit at any Halloween gathering.
DIY Stations
- Set up a DIY Dirt Cup station where guests can layer their own pudding, Oreos, and gummy worms. Provide various toppings like sprinkles or chocolate chips for added fun.
Kids’ Parties
- Incorporate fun straws or colorful spoons with each cup. This will make the dessert more exciting for kids and encourage them to dig into their Dirt Cups.
How to Perfect Dirt Cups
Creating the ultimate Dirt Cups is all about attention to detail. Here are some tips to ensure they turn out perfectly every time.
Choose quality ingredients: Use fresh milk and high-quality whipped topping for the best flavor. This enhances the overall taste of your Dirt Cups.
Allow proper chilling: Let the Dirt Cups chill in the refrigerator for at least 30 minutes before serving. This helps set the layers and improves texture.
Crush Oreos finely: Ensure that you crush the Oreo cookies into fine pieces for even distribution on top of the pudding layer. This adds crunch without overwhelming each bite.
Garnish creatively: Experiment with different toppings such as mini chocolate chips or edible glitter for an extra special touch that excites your guests.
Layer carefully: When layering the pudding and crushed Oreos, take your time. A neat presentation will make your Dirt Cups look more appetizing.
Best Side Dishes for Dirt Cups
If you’re looking to complement your Dirt Cups with some delicious side dishes, consider these tasty options that pair well with this fun dessert.
- Fruit Salad: A refreshing mix of seasonal fruits adds brightness and balance, making it a perfect sidekick to rich desserts.
- Mini Sandwiches: Bite-sized sandwiches filled with deli meats or veggies provide savory contrast and can satisfy varying tastes.
- Veggie Platter: Crisp vegetables served with ranch dip offer a crunchy texture that pairs nicely against creamy desserts like Dirt Cups.
- Cheese Board: An assortment of cheeses with crackers creates an elegant addition that balances sweetness with savory flavors.
- Chocolate-Covered Pretzels: These sweet-and-salty treats are easy to grab and enjoy alongside your delightful Dirt Cups.
- Ice Cream: A scoop of vanilla or cookies-and-cream ice cream complements the chocolate flavors in your Dirt Cups wonderfully.
Common Mistakes to Avoid
Making Dirt Cups can be fun, but there are a few common mistakes that can affect the outcome. Avoid these pitfalls to ensure your dessert turns out perfectly.
- Skipping the Thicken Time: Not allowing the pudding to sit for five minutes can result in a runny texture. Give it time to thicken properly before mixing in the whipped topping.
- Overmixing the Whipped Topping: Mixing too vigorously can deflate the whipped topping, leading to a denser pudding. Gently fold it in to maintain a light and airy texture.
- Using Warm Milk: If you use warm milk instead of cold, the pudding will not set correctly. Always start with cold milk for best results.
- Not Crushing Oreos Enough: Large chunks of Oreos may not blend well with the pudding. Crush them finely for an even layer of flavor and texture.
- Skipping the Chill Step: Serving Dirt Cups immediately may not give them the best taste. Chilling allows flavors to meld and improves overall enjoyment.
Refrigerator Storage
- Store Dirt Cups in an airtight container in the refrigerator.
- They will stay fresh for up to 3 days.
- Cover each cup with plastic wrap if stored individually.
Freezing Dirt Cups
- Freezing is not recommended due to the texture changes in whipped topping and pudding.
- If necessary, store in a freezer-safe container for up to 1 month.
- Thaw overnight in the refrigerator before serving.
Reheating Dirt Cups
- Oven: Not recommended for Dirt Cups as they should be served chilled.
- Microwave: Avoid using a microwave; it will alter the texture of the pudding and whipped topping.
- Stovetop: Not applicable; these cups are best enjoyed cold.
Frequently Asked Questions
What are Dirt Cups?
Dirt Cups are a fun dessert made with layers of chocolate pudding, crushed Oreos, and gummy worms, often enjoyed by kids at parties or as a nostalgic treat.
Can I customize my Dirt Cups?
Absolutely! You can add different toppings like sprinkles or use different types of cookies and candy to make them unique.
How long do Dirt Cups last?
When stored properly in the refrigerator, Dirt Cups can last up to 3 days. Just remember to keep them covered!
Can I use different flavors of pudding?
Yes! While chocolate is classic, you can experiment with vanilla or other flavors based on your preference.
Are there any allergy concerns with Dirt Cups?
Dirt Cups contain dairy from milk and whipped topping, as well as gluten from Oreos. Always check ingredient labels if allergies are a concern.
Final Thoughts
Dirt Cups are a delightful dessert that brings joy to both kids and adults alike. Their versatility allows you to customize them according to your taste preferences or special occasions. Try making these charming cups at your next gathering, and feel free to get creative with your toppings!
Did You Enjoy Making This Recipe? Please rate this recipe with ⭐⭐⭐⭐⭐ or leave a comment.
📖 Recipe Card
Print
Dirt Cups
- Total Time: 0 hours
- Yield: Serves 8
Description
Dirt Cups are a whimsical dessert that combines rich chocolate pudding, crunchy crushed Oreos, and colorful gummy worms, making them a hit at parties and gatherings. This fun treat not only delights kids but also brings out the inner child in adults. With just a few simple ingredients and minimal prep time, you can create these layered delights that are as enjoyable to make as they are to eat. Whether you’re hosting a birthday party or celebrating Halloween, Dirt Cups offer endless customization options. Add sprinkles for a festive touch or experiment with different flavors of pudding for a unique twist. These delightful cups are sure to be the centerpiece of any dessert table!
Ingredients
- 3.4 ounces instant chocolate pudding mix
- 2 cups cold milk
- 8 ounces whipped topping (thawed)
- 10–12 Oreo cookies (crushed)
- 32 gummy worms
Instructions
- In a mixing bowl, combine the cold milk and pudding mix. Whisk until well blended.
- Allow the mixture to thicken for about 5 minutes.
- Gently fold in the thawed whipped topping until fully integrated.
- Spoon the pudding mixture into serving cups, filling them nearly full.
- Sprinkle crushed Oreos on top of each cup.
- Decorate with four gummy worms on each cup.
- Chill in the refrigerator until ready to serve.
- Prep Time: 10 minutes
- Cook Time: None
- Category: Dessert
- Method: No cooking required
- Cuisine: American
Nutrition
- Serving Size: 1 serving
- Calories: 280
- Sugar: 22g
- Sodium: 150mg
- Fat: 14g
- Saturated Fat: 7g
- Unsaturated Fat: 6g
- Trans Fat: 0g
- Carbohydrates: 38g
- Fiber: 1g
- Protein: 3g
- Cholesterol: 15mg