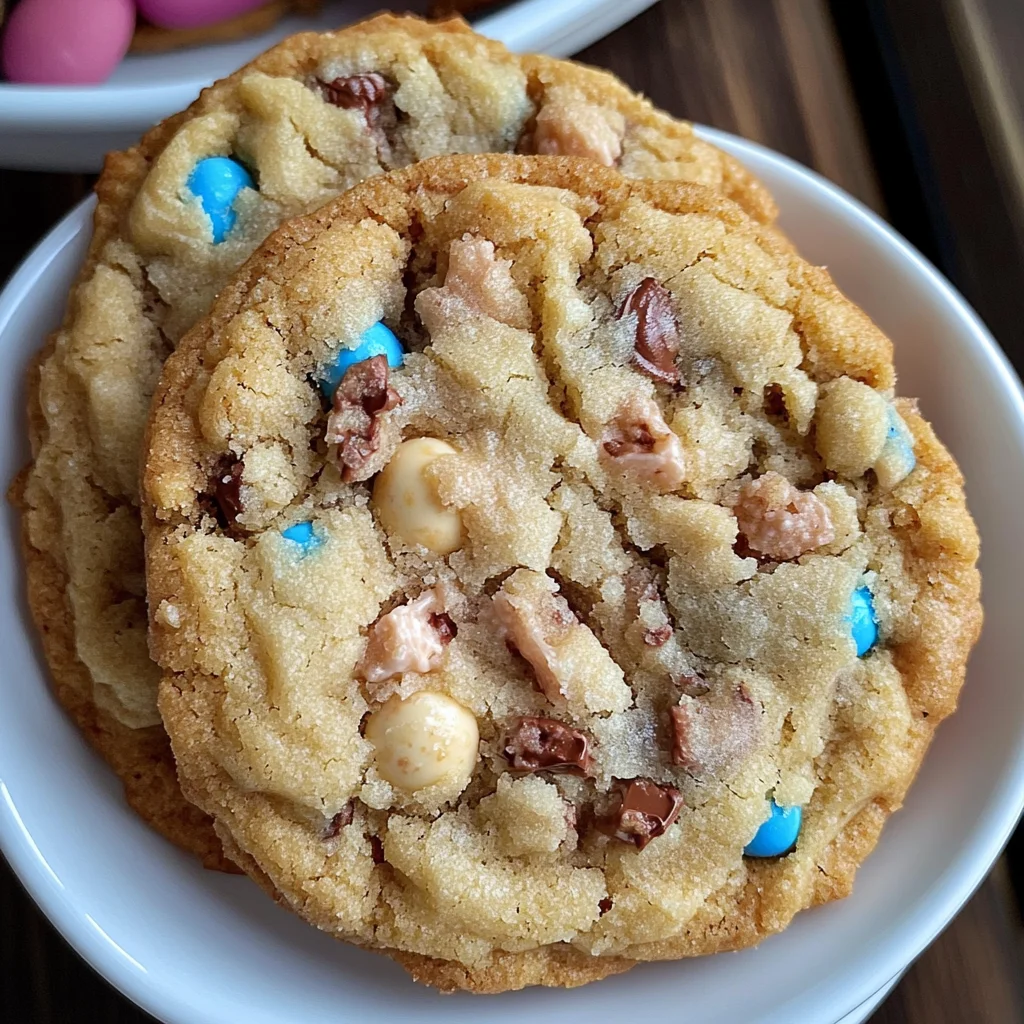
Spark conversation with this controversially named treat! The Easter Bunny Roadkill Cookie is a delightful chewy cookie with crispy edges, filled with chocolate malted balls. It’s perfect for various occasions, from Easter celebrations to casual gatherings. The standout feature of this cookie is its playful name, which is sure to elicit laughter and curiosity from friends and family.
Jump to:
- Why You’ll Love This Recipe
- Tools and Preparation
- Essential Tools and Equipment
- Importance of Each Tool
- Ingredients
- For the Dough
- For the Filling
- How to Make Easter Bunny Roadkill Cookie
- Step 1: Preheat the Oven
- Step 2: Mix Butter and Sugar
- Step 3: Add Dry Ingredients
- Step 4: Incorporate Malted Balls
- Step 5: Scoop Dough onto Baking Sheet
- Step 6: Bake Cookies
- How to Serve Easter Bunny Roadkill Cookie
- Share with Friends
- Pair with Milk
- Add a Festive Touch
- Create a Cookie Bar
- Gift in Treat Bags
- How to Perfect Easter Bunny Roadkill Cookie
- Best Side Dishes for Easter Bunny Roadkill Cookie
- Common Mistakes to Avoid
- Storage & Reheating Instructions
- Refrigerator Storage
- Freezing Easter Bunny Roadkill Cookie
- Reheating Easter Bunny Roadkill Cookie
- Frequently Asked Questions
- What makes the Easter Bunny Roadkill Cookie special?
- Can I customize my Easter Bunny Roadkill Cookie?
- How long do Easter Bunny Roadkill Cookies last?
- Can I make these cookies gluten-free?
- Final Thoughts
- 📖 Recipe Card
Why You’ll Love This Recipe
- Unique Name: The quirky title makes it a fun conversation starter at any gathering.
- Easy to Make: With simple ingredients and straightforward steps, you can whip these up in no time.
- Chewy Texture: Enjoy the delightful contrast between the chewy center and crispy edges.
- Versatile Treat: Perfect for Easter or any occasion where a sweet treat is welcome.
- Kid-Friendly: Kids will love both making and eating these cookies!
Tools and Preparation
To make your baking experience smoother, having the right tools is essential. Here’s what you’ll need to prepare your Easter Bunny Roadkill Cookies successfully.
Essential Tools and Equipment
- Stand mixer
- Whisk attachment
- Paddle attachment
- Baking sheet
- Silicone liner or parchment paper
- Wooden spoon
- Ice cream scoop
Importance of Each Tool
- Stand mixer: Saves time and effort when mixing dough, ensuring even consistency.
- Paddle attachment: Ideal for mixing thick batters without overworking them.
- Baking sheet: Provides a sturdy surface for baking that evenly distributes heat.
- Ice cream scoop: Helps create uniform cookie sizes for even baking.

Ingredients
For this fun treat, gather the following ingredients:
For the Dough
- 1 cup butter, (softened)
- 1 cup sugar
- 2 large eggs
- 1 teaspoon vanilla extract
- 2 1/4 cups all-purpose flour
- 1 teaspoon baking soda
- 1/2 teaspoon salt
For the Filling
- 3 cups malted milk eggs, (slightly crushed)
How to Make Easter Bunny Roadkill Cookie
Step 1: Preheat the Oven
Preheat your oven to 350 degrees Fahrenheit. Prepare a baking sheet by lining it with a silicone liner or parchment paper. Set it aside while you prepare the dough.
Step 2: Mix Butter and Sugar
In your stand mixer using the whisk attachment, combine the softened butter and sugar. Mix until well combined. Add the eggs and vanilla extract, then continue mixing until fluffy—about two minutes.
Step 3: Add Dry Ingredients
Change the whisk attachment to a paddle attachment. Gradually add the all-purpose flour, baking soda, and salt to the mixture. Mix until everything is well incorporated.
Step 4: Incorporate Malted Balls
Remove the bowl from your mixer. Add in the slightly crushed malted milk eggs. Using a wooden spoon, gently mix them into the cookie dough until they are evenly distributed—be careful not to overmix.
Step 5: Scoop Dough onto Baking Sheet
Using a small ice cream scoop, portion out mounds of cookie dough onto your prepared baking sheet. Ensure there is enough space between each mound as they will spread during baking; aim for no more than eight cookies per half-sheet pan.
Step 6: Bake Cookies
Place your baking sheet in the preheated oven and bake at 350 degrees Fahrenheit for about 10 minutes. Once baked, let the cookies cool on the sheet for 2-3 minutes before transferring them to a wire cooling rack to finish cooling completely.
Enjoy your delightful Easter Bunny Roadkill Cookies!
How to Serve Easter Bunny Roadkill Cookie
These quirky cookies are perfect for sharing and sparking laughter during your Easter celebrations. Here are some fun serving suggestions to enjoy your Easter Bunny Roadkill Cookies!
Share with Friends
- Invite friends over for a cookie tasting party and encourage them to guess the quirky name of these treats.
Pair with Milk
- Serve these cookies alongside a glass of cold milk for a classic combo that balances sweetness with richness.
Add a Festive Touch
- Plate the cookies on a colorful Easter-themed platter, adding small decorative eggs or spring flowers for an inviting presentation.
Create a Cookie Bar
- Set up a cookie bar featuring different toppings or dips, allowing guests to customize their own version of the Easter Bunny Roadkill Cookie.
Gift in Treat Bags
- Package individual cookies in clear treat bags tied with pastel ribbons to share as delightful gifts during Easter gatherings.
How to Perfect Easter Bunny Roadkill Cookie
To ensure your Easter Bunny Roadkill Cookies turn out perfectly chewy and delicious, consider these helpful tips.
- Use Room Temperature Butter: Softened butter mixes better with sugar, creating a fluffier texture in your cookies.
- Don’t Overmix the Dough: Once you add the crushed malted balls, mix just until incorporated. Overmixing can lead to tough cookies.
- Chill the Dough: For thicker cookies, chill the dough for 30 minutes before baking. This helps maintain their shape while baking.
- Monitor Baking Time: Keep an eye on the cookies as they bake. They should be golden around the edges but still soft in the center when taken out of the oven.
- Cool Properly: Allow cookies to cool on the baking sheet for a few minutes before transferring them to a cooling rack. This helps them set without falling apart.
Best Side Dishes for Easter Bunny Roadkill Cookie
Pair your Easter Bunny Roadkill Cookies with these delightful side dishes that complement their sweetness perfectly.
- Fresh Fruit Salad: A mix of seasonal fruits adds freshness and balances the richness of the cookies.
- Creamy Yogurt Parfait: Layer yogurt with granola and berries for a light, satisfying side that contrasts nicely with the sweet cookies.
- Cheese Platter: A variety of cheeses can enhance flavors and provide savory bites alongside your sweet treats.
- Veggie Sticks with Hummus: Crisp veggies paired with creamy hummus offer a healthy crunch that complements dessert well.
- Nut Mix: A selection of roasted nuts provides a crunchy texture and is great for snacking between bites of cookie.
- Deviled Eggs: These classic finger foods add protein and richness that balance out the sweetness of your baked goods.
- Mini Sandwiches: Small sandwiches filled with turkey or veggies can make for a hearty complement to your cookie spread.
- Chocolate-Dipped Strawberries: For an extra sweet touch, serve chocolate-dipped strawberries that echo the chocolate flavor in your cookies.
Common Mistakes to Avoid
Baking can be tricky, especially with a fun recipe like Easter Bunny Roadkill Cookies. Here are some common mistakes and how to avoid them:
- Skipping the Cooling Time: Allowing cookies to cool on the baking sheet is essential. If you transfer them too early, they may break apart.
- Not Measuring Ingredients Accurately: Precision is key in baking. Use dry measuring cups for flour and other dry ingredients for the best results.
- Overmixing the Dough: Overmixing can lead to tough cookies. Mix just enough to combine the ingredients thoroughly.
- Crowding the Baking Sheet: Giving cookies enough space to spread is vital. Aim for no more than 8 cookies per half sheet pan.
- Ignoring Oven Temperature: Ensure your oven is correctly preheated to 350 degrees. An inaccurate temperature can result in uneven baking.

Storage & Reheating Instructions
Refrigerator Storage
- Store cookies in an airtight container for up to 1 week.
- Place parchment paper between layers if stacking is necessary.
Freezing Easter Bunny Roadkill Cookie
- Freeze cookies in a single layer on a baking sheet before transferring them to a freezer-safe bag.
- They can be stored in the freezer for up to 3 months.
Reheating Easter Bunny Roadkill Cookie
- Oven: Preheat to 350°F, place cookies on a baking sheet, and heat for about 5-7 minutes until warm.
- Microwave: Heat individual cookies on a microwave-safe plate for about 10-15 seconds.
- Stovetop: Use a skillet over low heat, cover, and warm cookies for about 2-3 minutes.
Frequently Asked Questions
Curious about Easter Bunny Roadkill Cookies? Here are some questions that might help clarify!
What makes the Easter Bunny Roadkill Cookie special?
The unique combination of chocolate malted balls and chewy texture sets these cookies apart from regular treats.
Can I customize my Easter Bunny Roadkill Cookie?
Absolutely! You can add nuts or swap out malted eggs for your favorite candy pieces.
How long do Easter Bunny Roadkill Cookies last?
When stored properly, these cookies can last up to 1 week in the refrigerator or up to 3 months in the freezer.
Can I make these cookies gluten-free?
Yes! Simply use a gluten-free all-purpose flour blend instead of regular flour.
Final Thoughts
Easter Bunny Roadkill Cookies are not just delicious but also bring an element of fun and surprise to your dessert table. With their chewy texture and crispy edges, they offer a delightful treat that everyone will enjoy. Feel free to customize them with your favorite candies or nuts for an even more personalized touch!
Did You Enjoy Making This Recipe? Please rate this recipe with ⭐⭐⭐⭐⭐ or leave a comment.
📖 Recipe Card
Print
Easter Bunny Roadkill Cookie
- Total Time: 25 minutes
- Yield: Approximately 24 cookies 1x
Description
Treat your friends and family to a whimsical delight with these Easter Bunny Roadkill Cookies! These chewy cookies boast crispy edges and are filled with chocolate malted balls, making them an irresistible treat for any occasion. With their playful name and delightful texture, these cookies are sure to be a hit at your gatherings, sparking laughter and curiosity. Easy to make and kid-friendly, this recipe is perfect for celebrating springtime festivities or enjoying a casual afternoon snack.
Ingredients
- 1 cup softened butter
- 1 cup sugar
- 2 large eggs
- 1 teaspoon vanilla extract
- 2 1/4 cups all-purpose flour
- 1 teaspoon baking soda
- 1/2 teaspoon salt
- 3 cups slightly crushed malted milk eggs
Instructions
- Preheat your oven to 350°F and line a baking sheet with parchment paper.
- In a stand mixer, beat the softened butter and sugar until well combined. Add the eggs and vanilla, mixing until fluffy.
- Switch to a paddle attachment and gradually mix in the flour, baking soda, and salt until just combined.
- Gently fold in the crushed malted milk eggs using a wooden spoon.
- Scoop mounds of dough onto the prepared baking sheet, leaving space between each cookie.
- Bake for about 10 minutes until golden around the edges. Let cool on the sheet for a few minutes before transferring to a wire rack.
- Prep Time: 15 minutes
- Cook Time: 10 minutes
- Category: Dessert
- Method: Baking
- Cuisine: American
Nutrition
- Serving Size: 1 cookie (40g)
- Calories: 180
- Sugar: 10g
- Sodium: 90mg
- Fat: 8g
- Saturated Fat: 5g
- Unsaturated Fat: 3g
- Trans Fat: 0g
- Carbohydrates: 25g
- Fiber: 1g
- Protein: 2g
- Cholesterol: 35mg