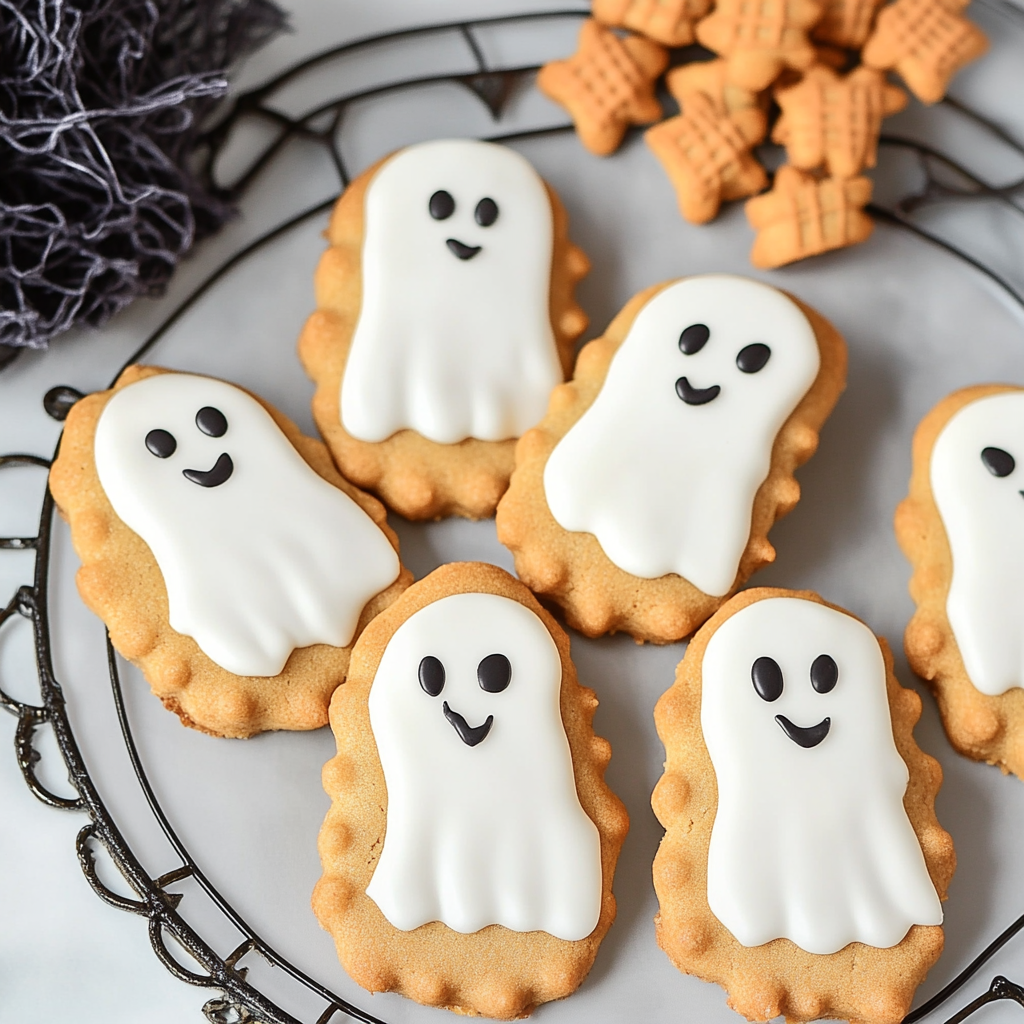
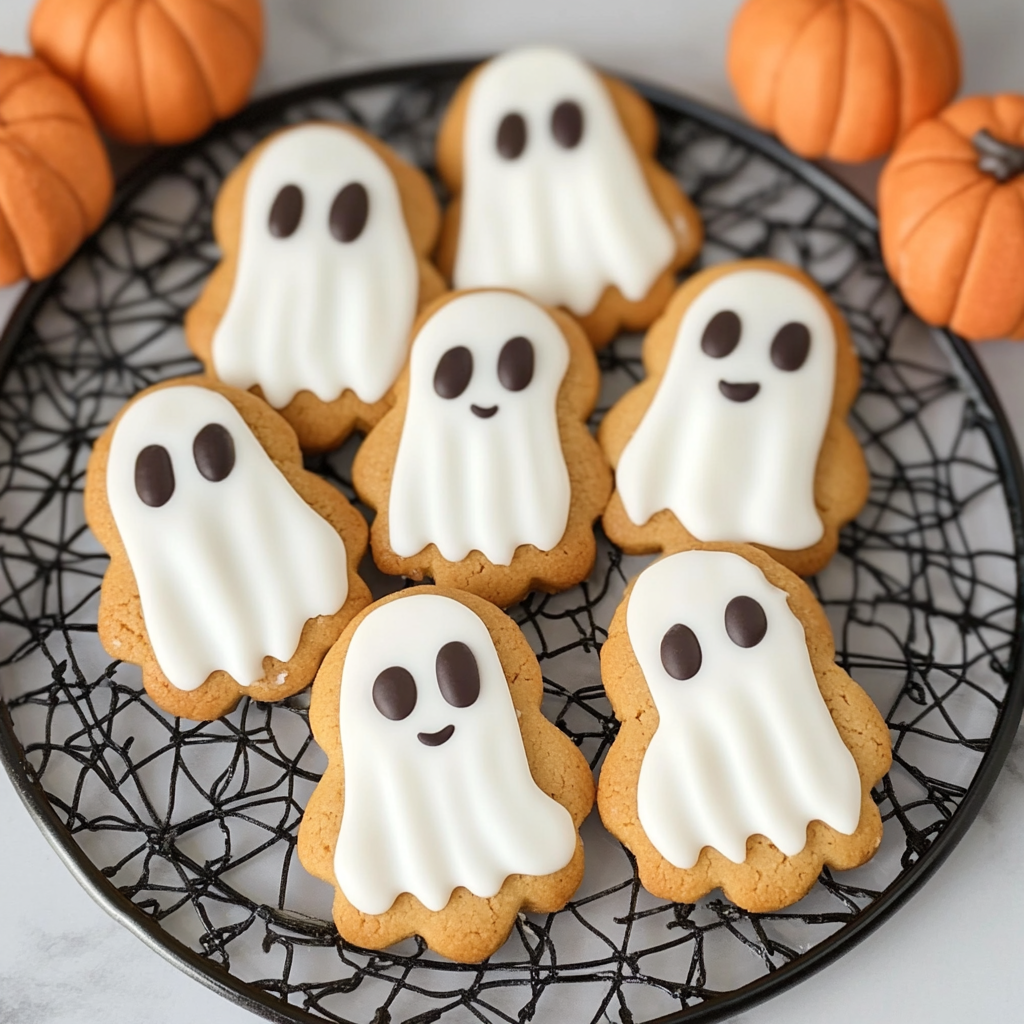
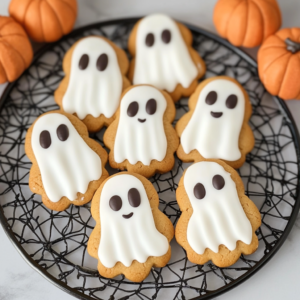
Nutter Butter Ghost Cookies are the perfect treat for Halloween! These adorable cookies are both fun to make and delicious to eat, featuring a delightful combination of creamy candy melts and chocolate accents. With just four simple ingredients, you can create these spooky snacks that are sure to please kids and adults alike at any Halloween gathering.
Jump to:
- Why You’ll Love This Recipe
- Tools and Preparation
- Essential Tools and Equipment
- Importance of Each Tool
- Ingredients
- For the Cookies
- How to Make Nutter Butter Ghost Cookies
- Step 1: Prepare Your Workspace
- Step 2: Melt the Candy Melts
- Step 3: Dip the Cookies
- Step 4: Add Ghost Faces
- Step 5: Let Them Set
- Step 6: Serve and Enjoy!
- How to Serve Nutter Butter Ghost Cookies
- With Milk
- Halloween-Themed Dessert Table
- As Party Favors
- With Ice Cream
- How to Perfect Nutter Butter Ghost Cookies
- Best Side Dishes for Nutter Butter Ghost Cookies
- Common Mistakes to Avoid
- Storage & Reheating Instructions
- Refrigerator Storage
- Freezing Nutter Butter Ghost Cookies
- Reheating Nutter Butter Ghost Cookies
- Frequently Asked Questions
- Can I use other types of cookies for Nutter Butter Ghost Cookies?
- How do I customize my Nutter Butter Ghost Cookies?
- Can I make Nutter Butter Ghost Cookies vegan?
- What if I can’t find candy eyeballs?
- Final Thoughts
- 📖 Recipe Card
Why You’ll Love This Recipe
- Quick and Easy: This recipe takes only 20 minutes from start to finish, making it ideal for busy schedules.
- Fun for Kids: Involving little chefs in the decorating process adds excitement and creativity to your baking.
- Minimal Ingredients: With just four ingredients, these cookies are easy to whip up without a long shopping list.
- Spooky Presentation: The ghostly appearance makes them a playful addition to any Halloween celebration.
- Versatile Treats: Perfect for parties, school events, or simply enjoying at home with family.
Tools and Preparation
To create these delightful Nutter Butter Ghost Cookies, having the right tools will streamline your process and ensure success.
Essential Tools and Equipment
- Baking sheet
- Wax paper
- Microwaveable bowl
- Spoon or spatula
Importance of Each Tool
- Baking sheet: Provides a sturdy surface for placing cookies while they set.
- Wax paper: Keeps cookies from sticking to the baking sheet for easy removal.
- Microwaveable bowl: Safe for melting candy melts without damaging the dish.
- Spoon or spatula: Essential for dipping cookies and spreading melted candy evenly.
Ingredients
To make Nutter Butter Ghost Cookies, gather the following ingredients:
For the Cookies
- 12 Nutter Butter cookies
- 1 cup white candy melts
- 24 candy eyeballs
- 12 mini chocolate chips
How to Make Nutter Butter Ghost Cookies
Step 1: Prepare Your Workspace
Line a baking sheet with wax paper. This will create a non-stick surface for your dipped cookies to cool on.
Step 2: Melt the Candy Melts
In a microwave-safe bowl, melt the white candy melts.
1. Microwave in 30-second intervals at 50% power.
2. Stir between each interval until smooth. Be cautious not to burn the candy melts; this should take about 4-5 minutes.
Step 3: Dip the Cookies
Carefully dip each Nutter Butter cookie into the melted white candy.
1. Cover approximately 70-75% of the cookie while leaving the bottom exposed.
2. Allow excess chocolate to drip off, tapping lightly against the bowl if needed.
Step 4: Add Ghost Faces
While the candy coating is still wet:
1. Press two candy eyeballs onto each cookie.
2. Place one mini chocolate chip below them as a mouth.
Step 5: Let Them Set
Transfer the dipped cookies onto your prepared baking sheet.
1. Allow them to set for about 5-10 minutes until fully hardened.
Step 6: Serve and Enjoy!
Once set, your Nutter Butter Ghost Cookies are ready! Serve them at your Halloween gatherings or enjoy them as a spooky snack anytime you crave something sweet.
How to Serve Nutter Butter Ghost Cookies
Nutter Butter Ghost Cookies are a fun and festive treat perfect for Halloween. They can be enjoyed in various ways that enhance their spooky charm and make them even more delightful.
With Milk
- Pair each cookie with a glass of cold milk. The creamy texture complements the sweetness of the candy melts perfectly.
Halloween-Themed Dessert Table
- Arrange Nutter Butter Ghost Cookies on a spooky dessert table alongside other Halloween treats. Their ghostly appearance will surely attract attention!
As Party Favors
- Package individual cookies in clear bags tied with orange or black ribbons. They make adorable party favors for guests at your Halloween gathering.
With Ice Cream
- Serve the cookies alongside a scoop of vanilla or pumpkin ice cream. The contrast of temperatures and flavors is irresistible.
How to Perfect Nutter Butter Ghost Cookies
Making Nutter Butter Ghost Cookies is simple, but a few tips can elevate them to perfection. Here’s how to ensure they turn out amazing every time:
- Use Fresh Candy Melts – Ensure the candy melts are fresh for smooth melting and better flavor.
- Microwave in Intervals – Melting candy melts in 30-second intervals prevents burning and helps achieve the right consistency.
- Cool Before Serving – Let the cookies sit until fully set; this ensures they hold their shape and makes for easier serving.
- Customize Faces – Get creative! Use different colored candies for unique ghost faces that will surprise your guests.
- Store Properly – Keep any leftovers in an airtight container at room temperature to maintain freshness.
Best Side Dishes for Nutter Butter Ghost Cookies
Nutter Butter Ghost Cookies can shine even brighter when served with complementary side dishes. Here are some great options to consider:
- Pumpkin Spice Latte – A warm beverage that brings autumn flavors, perfect alongside sweet cookies.
- Autumn Fruit Salad – Mix seasonal fruits like apples, pears, and pomegranate for a fresh contrast to the cookies’ sweetness.
- Chocolate-Dipped Pretzels – The salty crunch pairs wonderfully with sweet cookies, adding texture and flavor variety.
- Candy Corn Bowl – Offer a bowl of classic Halloween candy corn as a colorful and nostalgic side treat.
- Caramel Apple Slices – Provide sliced apples drizzled with caramel for a deliciously tart and sweet addition.
- Gummy Worms – Add some fun by serving gummy worms alongside the cookies for a playful touch that’s perfect for Halloween.
Common Mistakes to Avoid
Making Nutter Butter Ghost Cookies can be fun and simple, but it’s important to avoid certain pitfalls.
- Boldly melting too fast: Melting the white candy melts too quickly can lead to burning. Always use 30-second intervals at 50% power and stir in between.
- Boldly skipping the wax paper: Not lining your baking sheet can make it difficult to remove the cookies once set. Always use wax paper for easy removal.
- Boldly over-dipping: Dipping the cookies too deep can cover up the bottom, losing that cute ghost shape. Aim for a 70-75% coverage for the best look.
- Boldly rushing the setting time: Not allowing enough time for the candy coating to set can cause a mess. Let them sit for at least 5-10 minutes before serving.
- Boldly ignoring decorations: Forgetting to press in the candy eyeballs and chocolate chip while the coating is wet may result in them sliding off later. Decorate immediately after dipping.
Storage & Reheating Instructions
Refrigerator Storage
- Store Nutter Butter Ghost Cookies in an airtight container.
- They can last up to 5 days in the refrigerator.
Freezing Nutter Butter Ghost Cookies
- Place the cookies in a single layer on a baking sheet and freeze until solid.
- Transfer them to a freezer-safe container; they will keep for up to 3 months.
Reheating Nutter Butter Ghost Cookies
- Oven: Preheat oven to 300°F (150°C) and warm the cookies for about 5-7 minutes.
- Microwave: Heat each cookie for about 10-15 seconds on a microwave-safe plate.
- Stovetop: Use a non-stick skillet over low heat, warming each cookie briefly until just warm.
Frequently Asked Questions
Here are answers to some common questions about making Nutter Butter Ghost Cookies.
Can I use other types of cookies for Nutter Butter Ghost Cookies?
Yes! You can use any similar shaped cookie, but keep in mind that texture and flavor may vary.
How do I customize my Nutter Butter Ghost Cookies?
You can add different colored candy melts or use various candies for decoration based on your preference or holiday theme.
Can I make Nutter Butter Ghost Cookies vegan?
Yes! Substitute any dairy-based ingredients with plant-based alternatives where applicable, ensuring that all other ingredients are vegan-friendly.
What if I can’t find candy eyeballs?
You can use small chocolate chips or even M&M’s as an alternative for creating ghost eyes!
Final Thoughts
Nutter Butter Ghost Cookies are not just adorable; they are also incredibly easy to make with just four ingredients. This recipe is perfect for Halloween parties or as a fun family activity. Feel free to customize these treats with different toppings, colors, or even flavors to suit your taste!
Did You Enjoy Making This Recipe? Please rate this recipe with ⭐⭐⭐⭐⭐ or leave a comment.
📖 Recipe Card
Print
Nutter Butter Ghost Cookies
- Total Time: 20 minutes
- Yield: Makes approximately 12 cookies 1x
Description
Nutter Butter Ghost Cookies are the ultimate Halloween treat that combines fun and flavor in just four simple ingredients. These playful cookies are not only easy to make, but their adorable ghostly faces will delight both kids and adults alike. Perfect for Halloween parties, school events, or cozy family gatherings, these candy-coated delights add a festive touch to any celebration. The creamy white candy melts create a sweet exterior that pairs wonderfully with the classic Nutter Butter crunch. Get ready to impress your guests with these spooky snacks that are sure to vanish quickly!
Ingredients
- 12 Nutter Butter cookies
- 1 cup white candy melts
- 24 candy eyeballs
- 12 mini chocolate chips
Instructions
- Line a baking sheet with wax paper.
- Melt the white candy melts in a microwave-safe bowl using 30-second intervals at 50% power, stirring until smooth (about 4-5 minutes).
- Dip each Nutter Butter cookie in the melted candy, covering about 70-75% of the cookie.
- While still wet, press two candy eyeballs and one mini chocolate chip onto each cookie to create ghost faces.
- Place cookies on the prepared baking sheet and let them set for 5-10 minutes until hardened.
- Prep Time: 10 minutes
- Cook Time: 10 minutes
- Category: Dessert
- Method: Baking
- Cuisine: American
Nutrition
- Serving Size: 1 cookie (30g)
- Calories: 150
- Sugar: 14g
- Sodium: 20mg
- Fat: 8g
- Saturated Fat: 4g
- Unsaturated Fat: 4g
- Trans Fat: 0g
- Carbohydrates: 18g
- Fiber: 0g
- Protein: 1g
- Cholesterol: 0mg