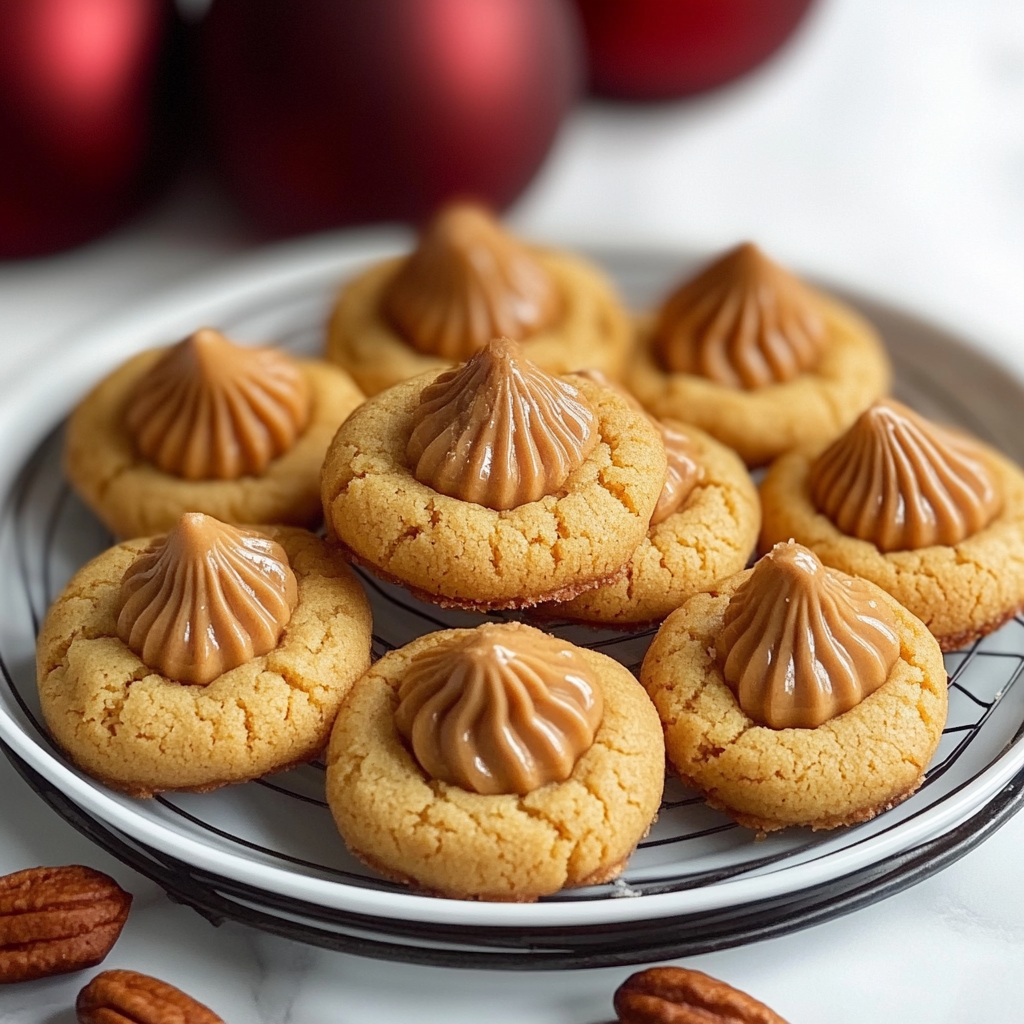
Peanut Butter Blossoms Recipe – Classic Christmas Cookies with a Perfect Sweet & Salty Twist are the ultimate holiday treat! These delightful cookies blend soft peanut butter dough with the rich sweetness of chocolate, creating a perfect balance of flavors. Ideal for cookie exchanges, festive gatherings, or simply enjoying at home, these cookies are easy to whip up and loved by everyone.
Jump to:
- Why You’ll Love This Recipe
- Tools and Preparation
- Essential Tools and Equipment
- Importance of Each Tool
- Ingredients
- For the Cookie Dough
- For Topping
- How to Make Peanut Butter Blossoms Recipe – Classic Christmas Cookies with a Perfect Sweet & Salty Twist
- Step 1: Preheat the Oven
- Step 2: Prepare the Dough
- Step 3: Combine Dry Ingredients
- Step 4: Shape and Roll
- Step 5: Bake
- Step 6: Cool and Set
- How to Serve Peanut Butter Blossoms Recipe – Classic Christmas Cookies with a Perfect Sweet & Salty Twist
- Cookie Platters
- Milk Pairing
- Gift Bags
- Dessert Buffets
- Santa’s Treat
- How to Perfect Peanut Butter Blossoms Recipe – Classic Christmas Cookies with a Perfect Sweet & Salty Twist
- Best Side Dishes for Peanut Butter Blossoms Recipe – Classic Christmas Cookies with a Perfect Sweet & Salty Twist
- Common Mistakes to Avoid
- Storage & Reheating Instructions
- Refrigerator Storage
- Freezing Peanut Butter Blossoms Recipe – Classic Christmas Cookies with a Perfect Sweet & Salty Twist
- Reheating Peanut Butter Blossoms Recipe – Classic Christmas Cookies with a Perfect Sweet & Salty Twist
- Frequently Asked Questions
- Can I use natural peanut butter in the Peanut Butter Blossoms Recipe?
- How do I make my Peanut Butter Blossoms more festive?
- What if I don’t have Hershey’s Kisses?
- How do I store leftover Peanut Butter Blossoms?
- Can I customize my Peanut Butter Blossoms Recipe?
- Final Thoughts
- 📖 Recipe Card
Why You’ll Love This Recipe
- Simple to Make: With straightforward steps and common ingredients, anyone can bake these cookies.
- Delicious Flavor: The combination of peanut butter and chocolate offers a delightful sweet and salty experience.
- Perfect for Sharing: Ideal for cookie swaps or gift-giving during the holiday season.
- Family-Friendly Fun: Kids love helping shape the dough and adding the chocolate kisses on top!
- Versatile Treat: Enjoy them year-round, not just during the holidays.
Tools and Preparation
To make your baking experience smooth, gather these essential tools before you start. Having everything ready will help you focus on creating delicious Peanut Butter Blossoms.
Essential Tools and Equipment
- Mixing bowls
- Baking sheets
- Parchment paper or silicone baking mats
- Measuring cups
- Electric mixer
Importance of Each Tool
- Mixing bowls: Essential for combining ingredients without mess.
- Baking sheets: Provide even heat distribution for perfectly baked cookies.
- Electric mixer: Saves time and effort when creaming butter and sugars together.
Ingredients
To create these irresistible Peanut Butter Blossoms, gather the following ingredients:
For the Cookie Dough
- 1 ¾ cups all-purpose flour
- ½ cup granulated sugar (plus extra for rolling)
- ½ cup packed light brown sugar
- ½ cup unsalted butter (softened)
- ½ cup creamy peanut butter
- 1 large egg
- 1 tsp vanilla extract
- 1 tsp baking soda
- ¼ tsp salt
For Topping
- 24 milk chocolate Hershey’s Kisses (unwrapped)
How to Make Peanut Butter Blossoms Recipe – Classic Christmas Cookies with a Perfect Sweet & Salty Twist
Step 1: Preheat the Oven
Preheat your oven to 375°F (190°C). Line your baking sheets with parchment paper or silicone baking mats to prevent sticking.
Step 2: Prepare the Dough
In a large mixing bowl, cream together the softened butter, granulated sugar, brown sugar, and peanut butter until light and fluffy. Add in the egg and vanilla extract, mixing until fully incorporated.
Step 3: Combine Dry Ingredients
In a separate bowl, whisk together the flour, baking soda, and salt. Gradually add this mixture to your wet ingredients, mixing just until combined.
Step 4: Shape and Roll
Scoop out small portions of dough and roll them into 1-inch balls. Roll each ball in granulated sugar until fully coated. Place them on the prepared baking sheets about 2 inches apart.
Step 5: Bake
Bake the cookies for 10-12 minutes or until the edges are lightly golden and slightly puffed. Remove from oven; immediately press a Hershey’s Kiss into the center of each cookie. The cookie will crack slightly around the edges—this is perfect!
Step 6: Cool and Set
Allow the cookies to cool on the baking sheet for about 5 minutes before transferring them to a wire rack to cool completely. This helps ensure that chocolate sets without melting too much.
Enjoy your Peanut Butter Blossoms as delightful additions to any festive occasion!
How to Serve Peanut Butter Blossoms Recipe – Classic Christmas Cookies with a Perfect Sweet & Salty Twist
These delightful Peanut Butter Blossoms are perfect for any festive occasion. Whether you’re hosting a holiday party or simply enjoying them at home, here are some creative serving suggestions.
Cookie Platters
- Arrange these cookies on a beautiful platter, mixing with other holiday cookies for a colorful display.
Milk Pairing
- Serve with a glass of cold milk. The creamy texture complements the rich peanut butter and chocolate perfectly.
Gift Bags
- Package individual cookies in festive bags as gifts for friends and family. Tie with a ribbon for an extra touch.
Dessert Buffets
- Include Peanut Butter Blossoms on dessert tables at parties. They add a classic touch that everyone loves.
Santa’s Treat
- Leave these cookies out for Santa on Christmas Eve. They are sure to be his favorite!
How to Perfect Peanut Butter Blossoms Recipe – Classic Christmas Cookies with a Perfect Sweet & Salty Twist
To ensure your Peanut Butter Blossoms turn out perfectly every time, follow these tips for the best results.
- Use room temperature ingredients: This helps the butter and peanut butter blend smoothly into the sugars.
- Don’t overmix the dough: Mix until just combined to keep the cookies soft and tender.
- Chill the dough if necessary: If your dough is too soft, refrigerate it for 30 minutes before rolling into balls.
- Watch baking time closely: Remove them from the oven when they are slightly puffed and golden around the edges for the best texture.
- Press Kisses while hot: Press the Hershey’s Kisses into the cookies immediately after baking for perfect melting.
- Store properly: Keep cookies in an airtight container to maintain freshness and avoid them getting hard.
Best Side Dishes for Peanut Butter Blossoms Recipe – Classic Christmas Cookies with a Perfect Sweet & Salty Twist
Peanut Butter Blossoms pair wonderfully with various side dishes that can enhance your dessert experience. Here are some great options to consider.
- Fruit Salad
A refreshing mix of seasonal fruits balances out the sweetness of the cookies nicely. - Vanilla Ice Cream
Serve warm cookies over scoops of vanilla ice cream for an indulgent dessert treat. - Hot Chocolate
A rich cup of homemade hot chocolate complements the flavors of peanut butter and chocolate beautifully. - Coffee
Brewed coffee provides a nice contrast to the sweet flavors, making it a great pairing option. - Chocolate Dipped Strawberries
These elegant treats add an extra layer of chocolatey goodness alongside your cookies. - Nuts Variety Platter
A selection of roasted nuts offers a crunchy and savory contrast that pairs well with sweet cookies.
Common Mistakes to Avoid
Making Peanut Butter Blossoms can be simple, but a few common mistakes can lead to less-than-perfect cookies. Here are some tips to keep your baking on track.
- Skipping the cooling time: Not allowing the cookies to cool before transferring them can result in a gooey mess. Let them sit for at least 5 minutes on the baking sheet for better handling.
- Not measuring flour accurately: Too much or too little flour can affect the cookie’s texture. Use a kitchen scale or spoon and level your measuring cup for accuracy.
- Using cold butter: Cold butter doesn’t cream well with sugars, leading to dense cookies. Always use softened butter, which helps create a light and fluffy dough.
- Overbaking the cookies: Baking for too long can make your cookies dry. Keep an eye on them; they should be lightly golden around the edges when done.
- Neglecting to roll in sugar: Rolling the dough balls in sugar before baking enhances the sweetness and gives a delightful crunch. Don’t skip this step!
- Forgetting to press in the chocolate: Pressing a Hershey’s Kiss into each cookie immediately after baking is key. It creates that signature look and ensures it melts slightly into the cookie.
Storage & Reheating Instructions
Refrigerator Storage
- Store Peanut Butter Blossoms in an airtight container.
- They will stay fresh for up to one week in the refrigerator.
Freezing Peanut Butter Blossoms Recipe – Classic Christmas Cookies with a Perfect Sweet & Salty Twist
- You can freeze these cookies for up to three months.
- Place them in a single layer on a baking sheet until frozen, then transfer into an airtight container or freezer bag.
Reheating Peanut Butter Blossoms Recipe – Classic Christmas Cookies with a Perfect Sweet & Salty Twist
- Oven: Preheat your oven to 350°F (175°C). Bake for about 5-7 minutes until warmed through.
- Microwave: Heat one cookie at a time for about 10-15 seconds, checking to ensure it does not become too hot.
- Stovetop: Place cookies in a pan over low heat for about 1-2 minutes, turning occasionally.
Frequently Asked Questions
Here are some common questions about making Peanut Butter Blossoms.
Can I use natural peanut butter in the Peanut Butter Blossoms Recipe?
Yes, natural peanut butter can be used, but it may alter the texture slightly. Ensure it’s stirred well before measuring.
How do I make my Peanut Butter Blossoms more festive?
You can sprinkle colored sugar on top before baking or use different types of chocolate candies instead of Hershey’s Kisses.
What if I don’t have Hershey’s Kisses?
You can substitute with any chocolate candy that you enjoy, such as chocolate chips or mini chocolate bars.
How do I store leftover Peanut Butter Blossoms?
Store them in an airtight container at room temperature or refrigerate them for extended freshness.
Can I customize my Peanut Butter Blossoms Recipe?
Absolutely! Feel free to add chopped nuts, chocolate chips, or even drizzle melted chocolate on top after they cool for an extra touch.
Final Thoughts
Peanut Butter Blossoms are not only delicious but also versatile enough to suit various occasions. Whether you’re making them for holiday gatherings or just because, these classic Christmas cookies bring joy with their sweet and salty twist. Don’t hesitate to customize them with your favorite toppings or flavors!
Did You Enjoy Making This Recipe? Please rate this recipe with ⭐⭐⭐⭐⭐ or leave a comment.
📖 Recipe Card
Print
Peanut Butter Blossoms
- Total Time: 27 minutes
- Yield: Approximately 24 cookies 1x
Description
Indulge in the delightful world of Peanut Butter Blossoms, a classic cookie that combines the rich, creamy taste of peanut butter with the sweet kiss of chocolate. These cookies are soft and chewy with a perfect balance of sweet and salty flavors, making them a must-have for any festive occasion or cozy night in. Easy to prepare and fun to make with family, these treats are ideal for cookie exchanges or simply enjoying at home. Whether you decorate them for the holidays or savor them year-round, they are sure to become a beloved favorite.
Ingredients
- 1 ¾ cups all-purpose flour
- ½ cup granulated sugar (plus extra for rolling)
- ½ cup packed light brown sugar
- ½ cup unsalted butter (softened)
- ½ cup creamy peanut butter
- 1 large egg
- 1 tsp vanilla extract
- 1 tsp baking soda
- ¼ tsp salt
- 24 milk chocolate candies (unwrapped)
Instructions
- Preheat your oven to 375°F (190°C) and line baking sheets with parchment paper.
- In a mixing bowl, cream together softened butter, granulated sugar, brown sugar, and peanut butter until fluffy. Mix in egg and vanilla until combined.
- In another bowl, whisk together flour, baking soda, and salt. Gradually add to the wet mixture until just combined.
- Roll dough into 1-inch balls and coat each in granulated sugar. Place on prepared baking sheets about 2 inches apart.
- Bake for 10-12 minutes until lightly golden around the edges. Immediately press a chocolate candy into the center of each cookie after removing from the oven.
- Cool on the baking sheet for about 5 minutes before transferring to a wire rack.
- Prep Time: 15 minutes
- Cook Time: 12 minutes
- Category: Dessert
- Method: Baking
- Cuisine: American
Nutrition
- Serving Size: 1 cookie (approximately 18g)
- Calories: 90
- Sugar: 6g
- Sodium: 50mg
- Fat: 4g
- Saturated Fat: 2g
- Unsaturated Fat: 2g
- Trans Fat: 0g
- Carbohydrates: 11g
- Fiber: <1g
- Protein: 2g
- Cholesterol: <5mg