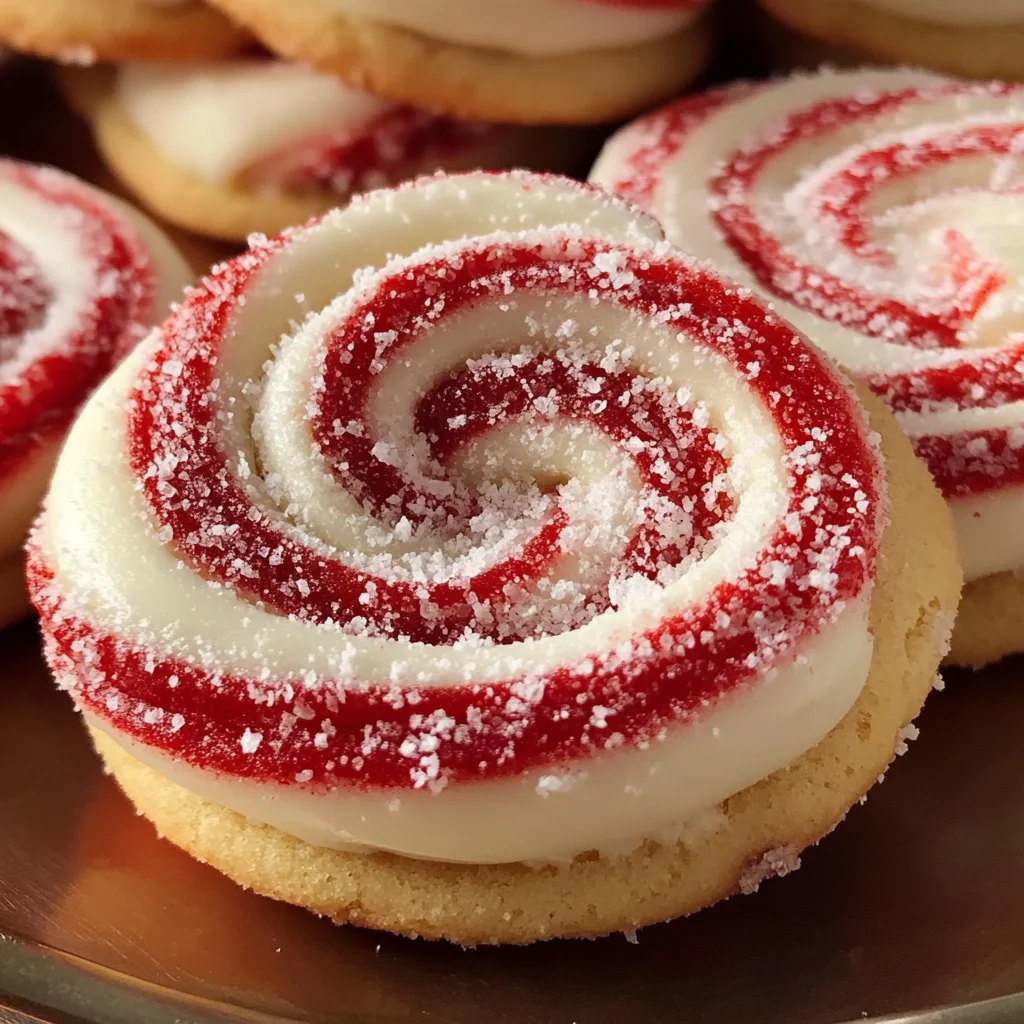
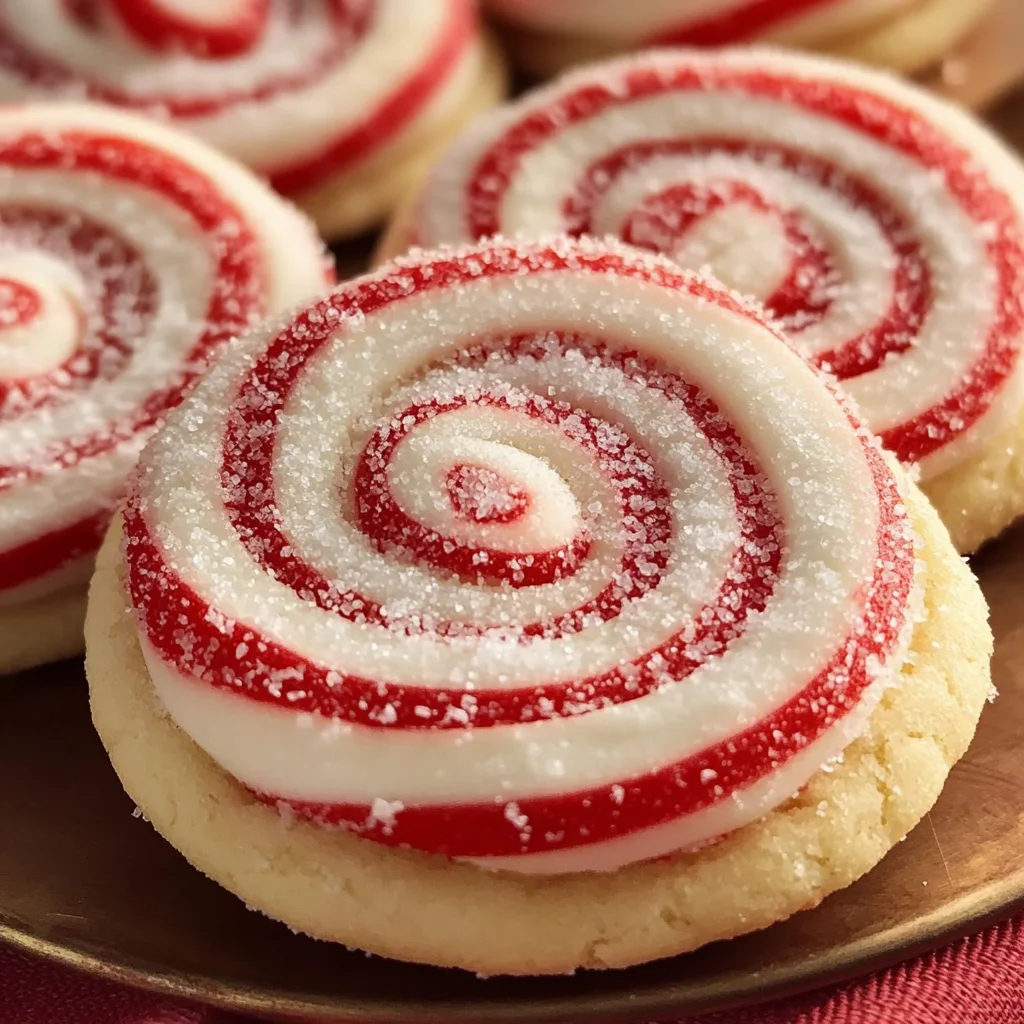
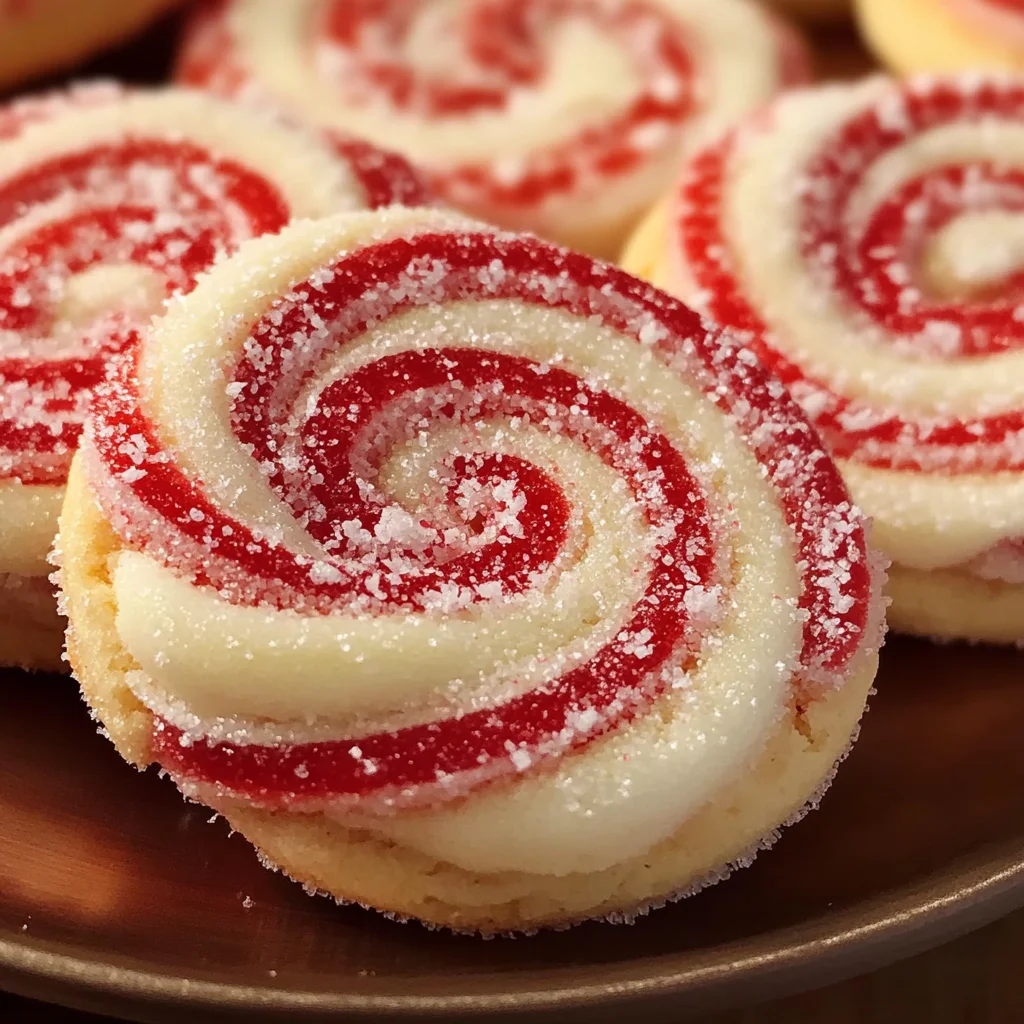
Peppermint Swirl Cookies are a delightful treat that brings festive cheer to any occasion. With their vibrant red and white swirls, these cookies not only look beautiful but also offer a delightful peppermint flavor that is perfect for holiday gatherings or cozy family nights. Easy to make and fun to decorate, they are sure to be a hit with kids and adults alike.
Jump to:
- Why You’ll Love This Recipe
- Tools and Preparation
- Essential Tools and Equipment
- Importance of Each Tool
- Ingredients
- For the Cookie Dough
- For Coloring and Coating
- How to Make Peppermint Swirl Cookies
- Step 1: Prepare Your Dry Ingredients
- Step 2: Cream Butter and Sugar
- Step 3: Combine Wet and Dry Ingredients
- Step 4: Color the Dough
- Step 5: Chill the Dough
- Step 6: Roll Out Dough
- Step 7: Layering Dough
- Step 8: Forming the Log
- Step 9: Second Chill
- Step 10: Preheat Oven
- Step 11: Coat Your Dough Log
- Step 12: Slice Cookies
- Step 13: Bake Cookies
- Step 14: Cool Down
- How to Serve Peppermint Swirl Cookies
- Cookie and Milk Pairing
- Festive Dessert Platter
- Warm Cookies with Ice Cream
- Gift Packaging
- Cookie Sandwiches
- How to Perfect Peppermint Swirl Cookies
- Best Side Dishes for Peppermint Swirl Cookies
- Common Mistakes to Avoid
- Storage & Reheating Instructions
- Refrigerator Storage
- Freezing Peppermint Swirl Cookies
- Reheating Peppermint Swirl Cookies
- Frequently Asked Questions
- Can I use different extracts in Peppermint Swirl Cookies?
- How do I make my Peppermint Swirl Cookies more colorful?
- What should I do if my dough is too sticky?
- How can I customize my Peppermint Swirl Cookies?
- Can I make these cookies gluten-free?
- Final Thoughts
- 📖 Recipe Card
Why You’ll Love This Recipe
- Visually Stunning: The striking red and white swirls create an eye-catching presentation.
- Delicious Flavor: The combination of vanilla and peppermint extracts provides a refreshing taste.
- Perfect for Sharing: These cookies make a great gift for friends or neighbors during the holidays.
- Fun to Make: Chilling and rolling the dough adds an element of fun for bakers of all ages.
- Versatile Treat: Enjoy them during holidays or as an everyday sweet snack.
Tools and Preparation
Before diving into your baking adventure, gather your essential tools. Having everything ready will streamline the process and enhance your enjoyment while making Peppermint Swirl Cookies.
Essential Tools and Equipment
- Electric mixer
- Mixing bowls
- Plastic wrap
- Rolling pin
- Parchment paper
- Baking sheets
Importance of Each Tool
- Electric mixer: This tool saves time and ensures the butter and sugar cream together perfectly, creating a light texture.
- Parchment paper: Using this prevents cookies from sticking to the baking sheet, resulting in easier removal and cleanup.
Ingredients
Here’s what you’ll need to whip up these delightful Peppermint Swirl Cookies:
For the Cookie Dough
- 2 and 1/2 cups all-purpose flour
- 1 teaspoon baking powder
- 1/2 teaspoon salt
- 1 cup (2 sticks) unsalted butter, softened
- 1 cup granulated sugar
- 1 large egg
- 1 teaspoon vanilla extract
- 1 teaspoon peppermint extract
For Coloring and Coating
- Red gel food coloring
- 1/4 cup coarse sugar or crushed peppermint candies for coating
How to Make Peppermint Swirl Cookies
Step 1: Prepare Your Dry Ingredients
In a medium bowl, whisk together the flour, baking powder, and salt. Set this mixture aside for later use.
Step 2: Cream Butter and Sugar
In a large bowl, using an electric mixer, cream together the softened butter and granulated sugar until light and fluffy. Beat in the egg followed by both extracts until well combined.
Step 3: Combine Wet and Dry Ingredients
Gradually add the dry ingredients to your wet mixture. Mix on low speed until just combined; be careful not to overmix as you want a soft dough.
Step 4: Color the Dough
Divide the dough in half. Leave one half plain. Add red gel food coloring to the second half, mixing until you achieve an even color.
Step 5: Chill the Dough
Wrap each ball of dough separately in plastic wrap. Chill in the refrigerator for at least 30 minutes; this firms the dough for easier handling when shaping.
Step 6: Roll Out Dough
On a lightly floured surface, roll out both halves of dough into rectangles measuring about 10×12 inches, ensuring they are about 1/4 inch thick.
Step 7: Layering Dough
Carefully place the red dough on top of the plain dough rectangle. Gently press them together so they adhere well.
Step 8: Forming the Log
Starting from one long side, roll up the layered dough tightly into a log. Press gently as you roll to eliminate air pockets, maintaining tightness throughout.
Step 9: Second Chill
Wrap your dough log tightly in plastic wrap again. Chill it in the refrigerator for at least 2 hours until very firm; this helps keep your swirls intact during slicing.
Step 10: Preheat Oven
Preheat your oven to 375°F (190°C) and line baking sheets with parchment paper while waiting for your log to chill.
Step 11: Coat Your Dough Log
Remove from refrigerator. If desired, brush lightly with water or whisked egg white before rolling in coarse sugar or crushed peppermint candies for added sweetness.
Step 12: Slice Cookies
Using a sharp knife, slice your chilled log into rounds about 1/4 inch thick. Place these on prepared baking sheets about an inch apart.
Step 13: Bake Cookies
Bake cookies for 8 to 10 minutes or until edges are lightly golden. Avoid overbaking for best results.
Step 14: Cool Down
Allow cookies to cool on baking sheets for several minutes before transferring them onto a wire rack to cool completely.
Enjoy your freshly baked Peppermint Swirl Cookies! These treats will surely bring joy wherever they go!
How to Serve Peppermint Swirl Cookies
Peppermint Swirl Cookies are delightful on their own, but they can be enhanced with a few creative serving ideas. Here are some fun ways to elevate your cookie experience.
Cookie and Milk Pairing
- Serve with cold milk for a classic combo that complements the peppermint flavor perfectly.
- Try almond or oat milk for a dairy-free option that adds a unique twist.
Festive Dessert Platter
- Arrange cookies on a decorative platter alongside other holiday treats like brownies or fruit tarts.
- Garnish the platter with peppermint sticks or holly leaves for a festive presentation.
Warm Cookies with Ice Cream
- Top warm cookies with a scoop of vanilla ice cream for a delicious dessert.
- Drizzle with chocolate or caramel sauce to enhance the flavors.
Gift Packaging
- Package cookies in clear bags tied with festive ribbons for thoughtful holiday gifts.
- Include a personalized recipe card for an extra special touch.
Cookie Sandwiches
- Make cookie sandwiches by adding frosting or whipped cream between two cookies.
- Use crushed peppermint candies in the filling for added flavor and crunch.
How to Perfect Peppermint Swirl Cookies
Perfecting your Peppermint Swirl Cookies can take them from good to great. Keep these tips in mind while baking.
- Chill the dough: Chilling the dough helps maintain its shape and prevents colors from bleeding during baking.
- Use high-quality extracts: Opt for pure peppermint and vanilla extracts for the best flavor profile.
- Roll evenly: Ensure both dough layers are rolled out to the same thickness for balanced swirls.
- Slice carefully: Use a sharp knife to slice the log into even rounds, preserving the swirl pattern.
- Monitor baking time: Keep an eye on your cookies while baking; remove them when edges are lightly golden to avoid overbaking.
- Cool completely: Let cookies cool completely on a wire rack before storing or serving to maintain texture.
Best Side Dishes for Peppermint Swirl Cookies
Pairing side dishes with Peppermint Swirl Cookies can create a delightful dessert spread. Here are some excellent options to consider.
- Hot Cocoa – Serve rich hot cocoa topped with whipped cream and chocolate shavings for a cozy treat.
- Fruit Salad – A refreshing fruit salad with seasonal fruits provides a light contrast to the sweet cookies.
- Cheese Platter – Offer a selection of cheeses like brie and gouda, which pair beautifully with sweet treats.
- Spiced Nuts – Roasted spiced nuts add crunch and savory notes that balance the sweetness of the cookies.
- Mini Cheesecakes – Individual cheesecakes topped with berry compote make an elegant addition to your dessert table.
- Caramel Sauce Dip – Serve caramel sauce as a dip alongside cookies for an indulgent experience.
- Chocolate Fondue – Set up a chocolate fondue station where guests can dip fruits, marshmallows, and cookie pieces.
- Yogurt Parfait – Layer yogurt, granola, and fresh berries in cups for a deliciously healthy side option.
Common Mistakes to Avoid
Making Peppermint Swirl Cookies can be a delightful experience, but avoiding common mistakes will ensure your cookies turn out perfectly.
- Boldly mixing the dough: Overmixing the dough can lead to tough cookies. Mix until just combined to keep them soft and tender.
- Ignoring chill time: Skipping the chilling step can cause the dough to spread too much while baking. Always chill the dough as instructed for better shape and texture.
- Not measuring ingredients correctly: Using too much flour or sugar can alter the cookie’s texture. Use a kitchen scale or proper measuring cups for accuracy.
- Baking on an ungreased pan: Baking without parchment paper or greasing the pan can lead to stuck cookies. Always line your baking sheets for easy removal.
- Overbaking the cookies: Baking them too long may result in dry cookies. Watch closely and remove them when edges are lightly golden.
- Forgetting about cooling time: Moving cookies too soon from the baking sheet can cause breakage. Let them cool on the sheet before transferring.
Storage & Reheating Instructions
Refrigerator Storage
- Store Peppermint Swirl Cookies in an airtight container.
- They will last for up to one week in the refrigerator.
Freezing Peppermint Swirl Cookies
- Wrap individual cookies in plastic wrap before placing them in a freezer-safe bag.
- They can be frozen for up to three months.
Reheating Peppermint Swirl Cookies
- Oven: Preheat to 350°F (175°C) and bake for about 5 minutes until warm.
- Microwave: Heat one cookie at a time for about 10-15 seconds for a quick warm-up.
- Stovetop: Use a skillet over low heat, covering with a lid, and warm for a few minutes.
Frequently Asked Questions
Here are some common questions about making Peppermint Swirl Cookies.
Can I use different extracts in Peppermint Swirl Cookies?
Yes! You can substitute peppermint extract with other flavors like almond or vanilla for unique variations.
How do I make my Peppermint Swirl Cookies more colorful?
Add more gel food coloring gradually until you achieve your desired shade, ensuring even distribution throughout the dough.
What should I do if my dough is too sticky?
If your dough is sticky after mixing, chill it longer in the refrigerator until it’s firm enough to roll out easily.
How can I customize my Peppermint Swirl Cookies?
Feel free to mix in chocolate chips, nuts, or dried fruits into the dough before rolling it out for added flavor and texture.
Can I make these cookies gluten-free?
Yes! Substitute all-purpose flour with a gluten-free blend that measures cup-for-cup to achieve similar results.
Final Thoughts
Peppermint Swirl Cookies are not only visually stunning but also delightfully tasty. Their festive colors and refreshing peppermint flavor make them perfect for holiday gatherings or any occasion. Experiment with different flavors and decorations to make this recipe your own!
Did You Enjoy Making This Recipe? Please rate this recipe with ⭐⭐⭐⭐⭐ or leave a comment.
📖 Recipe Card
Print
Peppermint Swirl Cookies
- Total Time: 40 minutes
- Yield: Approximately 24 cookies 1x
Description
Indulge in the festive spirit with our Peppermint Swirl Cookies, a delightful treat that combines vibrant red and white swirls with a refreshing peppermint flavor. Perfect for holiday gatherings, these cookies are not only visually stunning but also easy to make and fun to decorate. Whether you’re sharing them as gifts or enjoying them during cozy family nights, they’re sure to be a hit with everyone. Follow this simple recipe to create a batch of cheerful minty delights that will brighten up any occasion.
Ingredients
- 2 and 1/2 cups all-purpose flour
- 1 teaspoon baking powder
- 1/2 teaspoon salt
- 1 cup unsalted butter, softened
- 1 cup granulated sugar
- 1 large egg
- 1 teaspoon vanilla extract
- 1 teaspoon peppermint extract
- Red gel food coloring
- Coarse sugar or crushed peppermint candies for coating
Instructions
- Preheat your oven to 375°F (190°C) and line baking sheets with parchment paper.
- In a medium bowl, whisk together flour, baking powder, and salt; set aside.
- In a large bowl, cream softened butter and sugar until light and fluffy. Mix in the egg and extracts until well combined.
- Gradually add the dry ingredients to the wet mixture until just combined.
- Divide dough in half: leave one half plain and color the other half with red gel food coloring.
- Chill both halves wrapped in plastic wrap for at least 30 minutes.
- Roll out each dough into rectangles about 10×12 inches thick (1/4 inch).
- Layer the red dough on top of the plain dough, press gently, then roll tightly into a log.
- Wrap the log again and chill for at least 2 hours.
- Slice chilled log into rounds (1/4 inch thick) and arrange on baking sheets.
- Bake for 8-10 minutes until edges are lightly golden; let cool before transferring.
- Prep Time: 30 minutes
- Cook Time: 10 minutes
- Category: Dessert
- Method: Baking
- Cuisine: American
Nutrition
- Serving Size: 1 cookie (25g)
- Calories: 115
- Sugar: 7g
- Sodium: 50mg
- Fat: 7g
- Saturated Fat: 4g
- Unsaturated Fat: 3g
- Trans Fat: 0g
- Carbohydrates: 12g
- Fiber: <1g
- Protein: <1g
- Cholesterol: 20mg