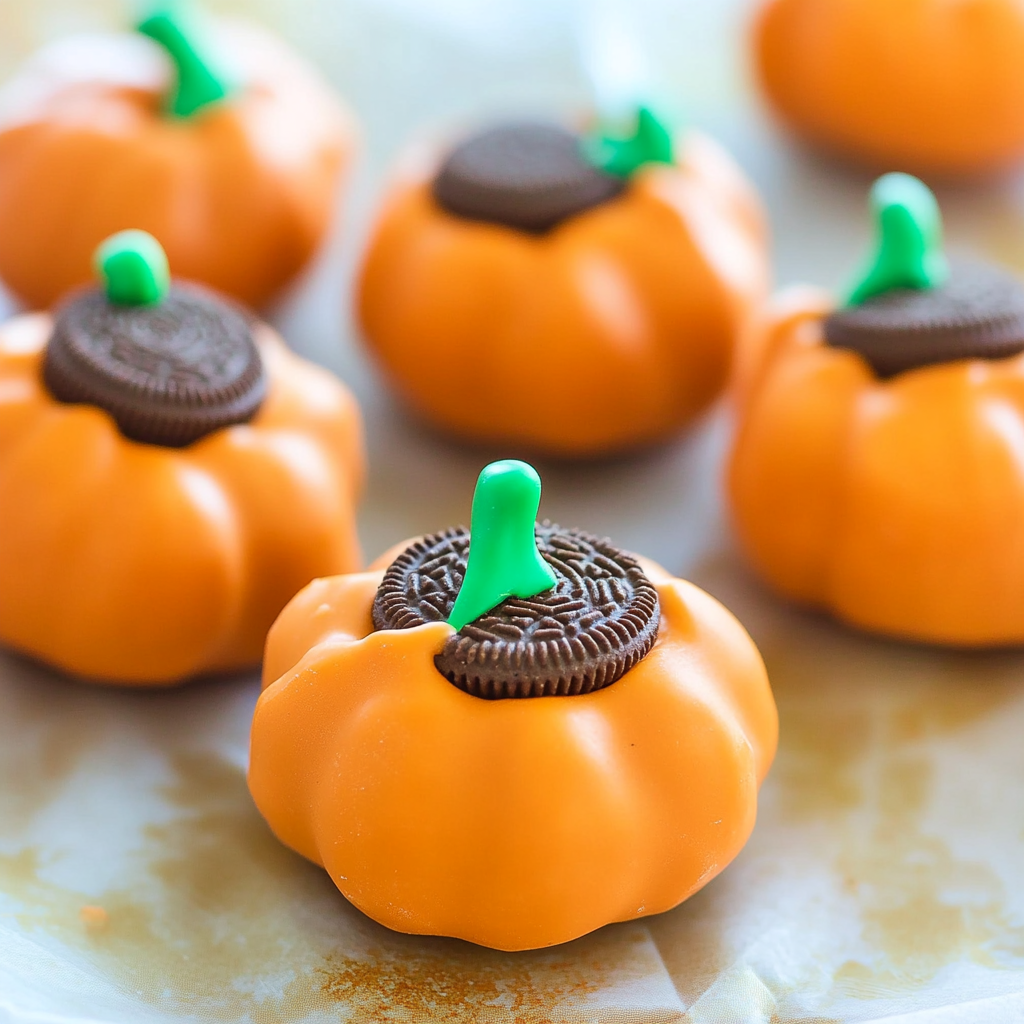
Pumpkin Oreo Balls are a delightful treat that combines the rich flavors of Oreo cookies and cream cheese with a festive pumpkin twist. These easy no-bake desserts are perfect for Halloween parties, fall gatherings, or any occasion where you want to impress your guests with a sweet and visually appealing snack. The vibrant orange coating and cute pretzel stick stems make them a fun addition to your dessert table.
Jump to:
- Why You’ll Love This Recipe
- Tools and Preparation
- Essential Tools and Equipment
- Importance of Each Tool
- Ingredients
- For the Filling
- For the Coating
- How to Make Pumpkin Oreo Balls
- Step 1: Prepare the Oreos
- Step 2: Combine with Cream Cheese
- Step 3: Shape into Balls
- Step 4: Create Pumpkin Designs
- Step 5: Melt Chocolate Coating
- Step 6: Dip and Decorate
- Step 7: Chill Until Serving
- How to Serve Pumpkin Oreo Balls
- Individual Treats
- Dessert Platters
- Gift Boxes
- Halloween Parties
- How to Perfect Pumpkin Oreo Balls
- Best Side Dishes for Pumpkin Oreo Balls
- Common Mistakes to Avoid
- Storage & Reheating Instructions
- Refrigerator Storage
- Freezing Pumpkin Oreo Balls
- Reheating Pumpkin Oreo Balls
- Frequently Asked Questions
- How do I make Pumpkin Oreo Balls?
- Can I customize my Pumpkin Oreo Balls?
- How long do Pumpkin Oreo Balls last?
- Can I use different cookies?
- What if I can’t find orange candy melts?
- Final Thoughts
- 📖 Recipe Card
Why You’ll Love This Recipe
- Easy to Make: No baking required! Just mix, shape, and chill.
- Deliciously Decadent: The creamy filling paired with chocolate creates an irresistible flavor combination.
- Perfect for Any Occasion: Ideal for Halloween, Thanksgiving, or casual get-togethers.
- Fun for Kids: Involve the little ones in decorating these adorable treats.
- Customizable: You can change the decorations to match any theme or celebration.
Tools and Preparation
Before you start making your Pumpkin Oreo Balls, gather these essential tools. Having everything ready will make the process smooth and enjoyable.
Essential Tools and Equipment
- Food processor
- Mixing bowl
- Parchment paper
- Baking sheet
- Toothpick
- Double boiler or microwave-safe bowl
Importance of Each Tool
- Food processor: Quickly crushes Oreo cookies into fine crumbs for easy mixing.
- Mixing bowl: Provides enough space to combine ingredients thoroughly without mess.
- Parchment paper: Prevents sticking, making it easier to remove your treats once they’re set.
Ingredients
To create these delightful Pumpkin Oreo Balls, here’s what you’ll need:
For the Filling
- 36 Oreo cookies
- 8 oz cream cheese (softened)
For the Coating
- 12 oz orange candy melts
How to Make Pumpkin Oreo Balls
Step 1: Prepare the Oreos
- Pulse Oreo cookies in a food processor until finely crumbled.
- Transfer crumbs into a mixing bowl.
Step 2: Combine with Cream Cheese
- Mix in cream cheese until well combined.
- Ensure the mixture is smooth and holds together when rolled.
Step 3: Shape into Balls
- Scoop out small portions of the mixture (about 1 inch each).
- Roll into balls and place them on a parchment-covered baking sheet.
- Refrigerate for 15 minutes to firm up.
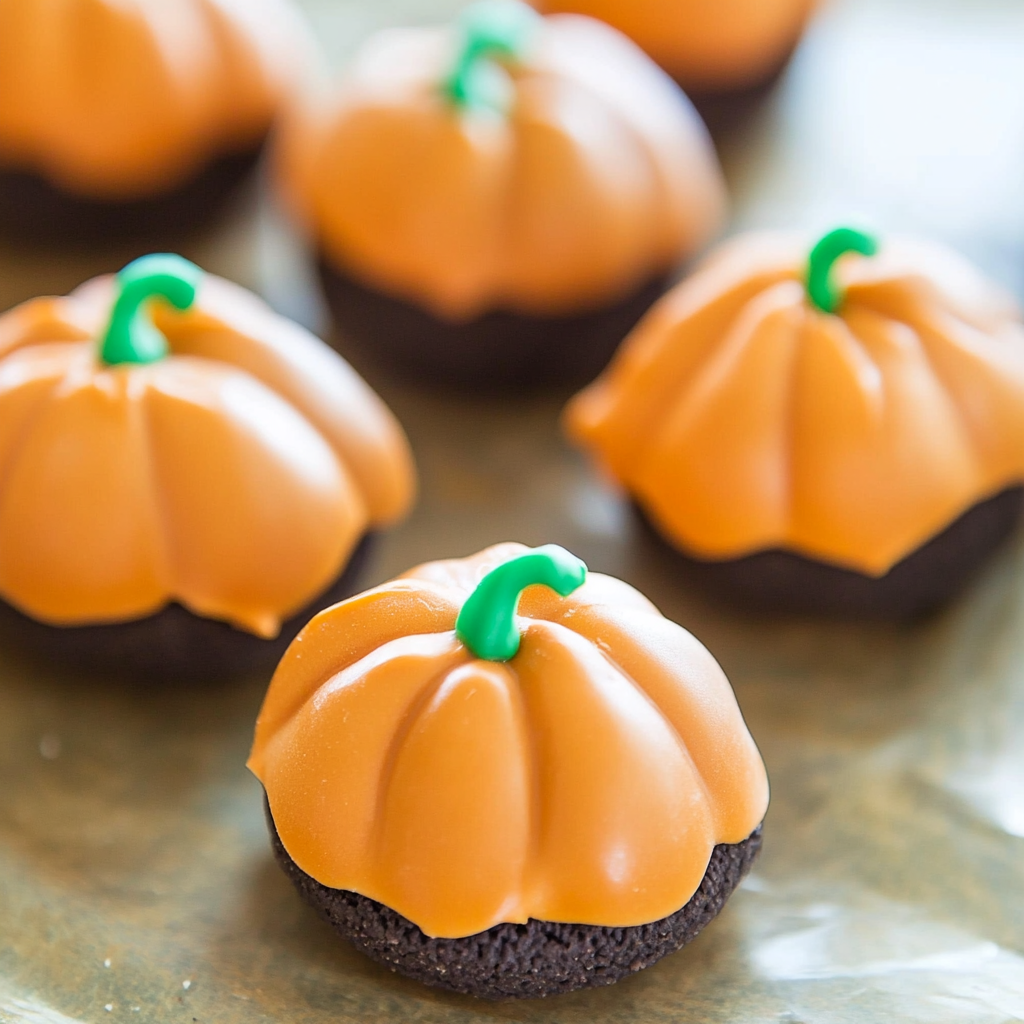
Step 4: Create Pumpkin Designs
- Use a toothpick to score lines into each ball to resemble pumpkins.
- Return them to the refrigerator for another 10 minutes.
Step 5: Melt Chocolate Coating
- Melt orange candy melts over a double boiler or in the microwave according to package directions.
Step 6: Dip and Decorate
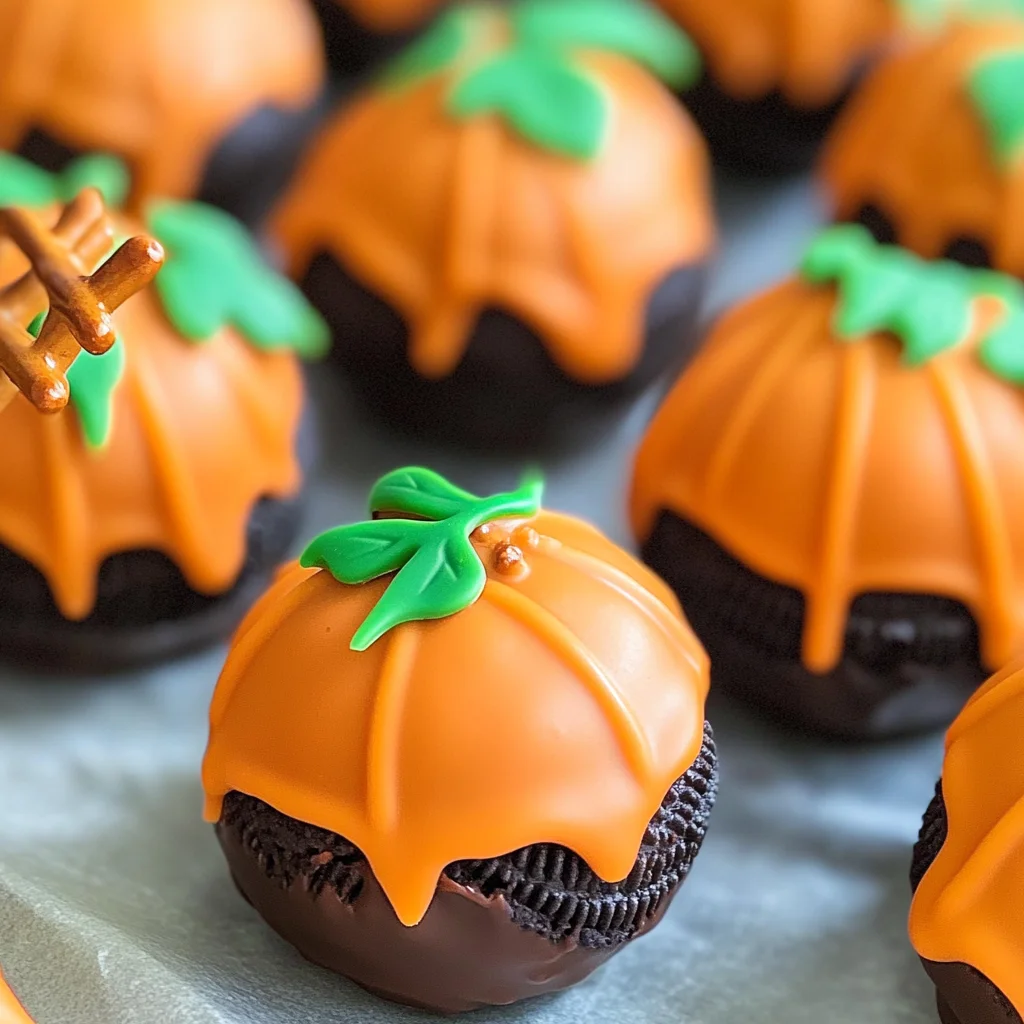
- Dip each pumpkin ball into melted chocolate; shake off excess.
- Place back on lined baking sheet and immediately decorate with a small pretzel stick and leaf icing decoration.
Step 7: Chill Until Serving
- Refrigerate until ready to serve, ensuring they stay firm and delicious!
With this simple recipe for Pumpkin Oreo Balls, you’ll have a show-stopping dessert that’s sure to delight everyone at your gathering!
How to Serve Pumpkin Oreo Balls
Pumpkin Oreo Balls make a delightful dessert that is perfect for any occasion. Whether it’s a festive gathering or a casual get-together, these treats can be served in various creative ways.
Individual Treats
- Serve each Pumpkin Oreo Ball in a small cupcake liner for an elegant touch.
Dessert Platters
- Arrange the Pumpkin Oreo Balls on a decorative platter alongside other desserts to create an enticing dessert table.
Gift Boxes
- Package them in clear gift boxes tied with ribbons as thoughtful homemade gifts for friends and family.
Halloween Parties
- Use themed decorations, like mini pumpkins, to enhance the presentation for Halloween celebrations.
How to Perfect Pumpkin Oreo Balls
To ensure your Pumpkin Oreo Balls are a hit, consider these helpful tips.
- Use softened cream cheese: This helps achieve a smooth mixture that easily combines with the crumbled Oreos.
- Chill before dipping: Refrigerating the balls before dipping in chocolate helps maintain their shape and prevents them from falling apart.
- Melt candy melts carefully: Use low heat in the microwave or double boiler to prevent burning the candy melts.
- Decorate immediately: Add pretzel sticks and icing decorations while the chocolate is still wet for better adhesion.
- Store properly: Keep Pumpkin Oreo Balls in an airtight container in the refrigerator to maintain freshness and flavor.
Best Side Dishes for Pumpkin Oreo Balls
Pairing side dishes with your Pumpkin Oreo Balls can elevate your dessert experience. Here are some great options:
- Fruit Salad: A refreshing mix of seasonal fruits balances the sweetness of the dessert.
- Cheese Platter: Include a variety of cheeses that complement the rich flavors of pumpkin and chocolate.
- Mini Cupcakes: Offer mini cupcakes with different frosting flavors to provide variety alongside your pumpkin treats.
- Spiced Nuts: Roasted spiced nuts add a crunchy contrast to the creamy texture of Pumpkin Oreo Balls.
- Chocolate Dipped Strawberries: These sweet berries enhance the chocolate flavor while adding a fruity twist.
- Caramel Sauce Dip: A small bowl of warm caramel sauce invites guests to dip their treats for an extra layer of sweetness.
Common Mistakes to Avoid
Creating Pumpkin Oreo Balls is simple, but avoiding common pitfalls can enhance your results.
- Bold ingredients: Using the wrong type of cream cheese can lead to a dry mixture. Ensure you use softened cream cheese for a smooth, creamy texture.
- Bold cookie crumbles: Not crumbling the Oreos finely can result in uneven balls. Make sure to pulse them in a food processor until they are finely ground.
- Bold chilling time: Skipping the refrigeration step can cause the balls to lose shape. Always refrigerate for the recommended time to maintain their form.
- Bold melting technique: Overheating the candy melts can cause them to seize. Follow package instructions carefully when melting for best results.
- Bold decoration timing: Waiting too long to add decorations may cause chocolate to harden. Decorate immediately after dipping for optimal adhesion.
Storage & Reheating Instructions
Refrigerator Storage
- Store in an airtight container in the refrigerator.
- Use within 5 days for best freshness.
Freezing Pumpkin Oreo Balls
- Freeze in a single layer on a baking sheet before transferring to a container.
- Store in a freezer-safe container for up to 3 months.
Reheating Pumpkin Oreo Balls
- Oven: Preheat to 350°F and warm for about 10 minutes. This maintains texture without melting the chocolate too much.
- Microwave: Heat on low power in 10-second intervals until just warmed. Be careful not to melt the chocolate coating.
- Stovetop: Use a double boiler on low heat, stirring gently until warmed through.
Frequently Asked Questions
Here are some common questions about making Pumpkin Oreo Balls that can help you along your cooking journey.
How do I make Pumpkin Oreo Balls?
To make Pumpkin Oreo Balls, simply crush Oreos, mix with softened cream cheese, form into balls, chill, dip in melted orange candy, and decorate!
Can I customize my Pumpkin Oreo Balls?
Absolutely! You can add spices like cinnamon or nutmeg for extra flavor or use different colors of candy melts for festive occasions.
How long do Pumpkin Oreo Balls last?
When stored properly in the refrigerator, they last about 5 days. If frozen, they can be enjoyed for up to 3 months.
Can I use different cookies?
Yes! While Oreos are classic, feel free to experiment with other sandwich cookies for unique flavors.
What if I can’t find orange candy melts?
You can substitute with white chocolate dyed orange using food coloring or simply use colored chocolate wafers available at craft stores.
Final Thoughts
Pumpkin Oreo Balls are delightful treats that combine rich flavors and fun decorations. Their no-bake nature makes them an easy dessert option for any gathering. Customize them with different toppings or cookie flavors to suit your taste!
Did You Enjoy Making This Recipe? Please rate this recipe with ⭐⭐⭐⭐⭐ or leave a comment.
📖 Recipe Card
Print
Pumpkin Oreo Balls
- Total Time: 0 hours
- Yield: Approximately 24 servings 1x
Description
Pumpkin Oreo Balls are the ultimate no-bake treat that combines the classic flavors of Oreo cookies and cream cheese with a festive pumpkin flair. These delightful bites are perfect for any gathering, from Halloween parties to cozy fall get-togethers. With their vibrant orange coating and charming pretzel stick stems, they add a playful touch to your dessert table. Easy to make and fun for kids to decorate, these delicious pumpkin snacks are sure to impress your guests!
Ingredients
- 36 Oreo cookies
- 8 oz cream cheese (softened)
- 12 oz orange candy melts
Instructions
- In a food processor, pulse the Oreo cookies until finely crumbled. Transfer the crumbs to a mixing bowl.
- Mix in the softened cream cheese until smooth and well combined.
- Scoop out portions of the mixture (about 1 inch each) and roll into balls. Place on a parchment-covered baking sheet and refrigerate for 15 minutes.
- Use a toothpick to score lines on each ball for a pumpkin effect, then chill for another 10 minutes.
- Melt the orange candy melts as per package instructions.
- Dip each pumpkin ball in the melted chocolate, shaking off excess, and place back on the lined sheet. Immediately add pretzel stick stems and decorations before the chocolate sets.
- Chill until ready to serve.
- Prep Time: 20 minutes
- Cook Time: None
- Category: Dessert
- Method: No-Bake
- Cuisine: American
Nutrition
- Serving Size: 1 serving
- Calories: 140
- Sugar: 12g
- Sodium: 50mg
- Fat: 8g
- Saturated Fat: 4g
- Unsaturated Fat: 3g
- Trans Fat: 0g
- Carbohydrates: 16g
- Fiber: 1g
- Protein: 1g
- Cholesterol: 10mg