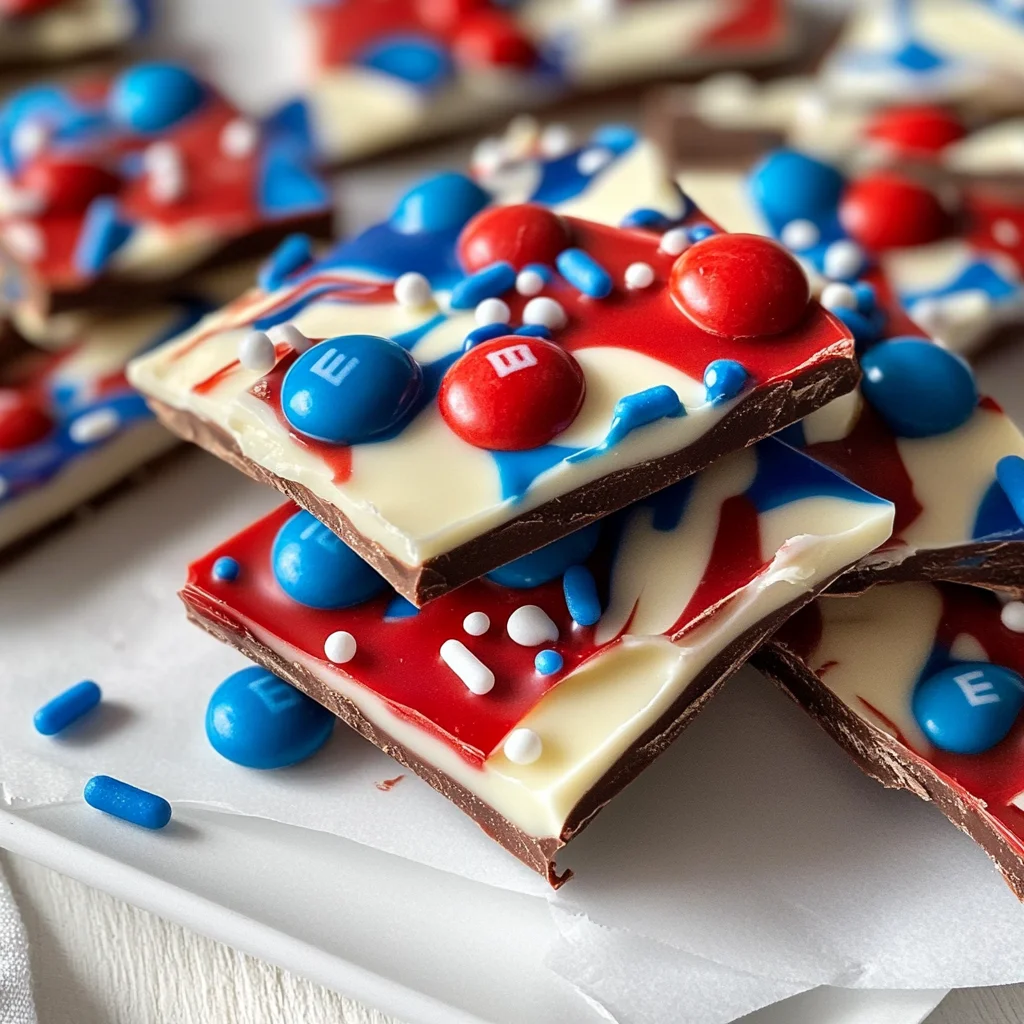
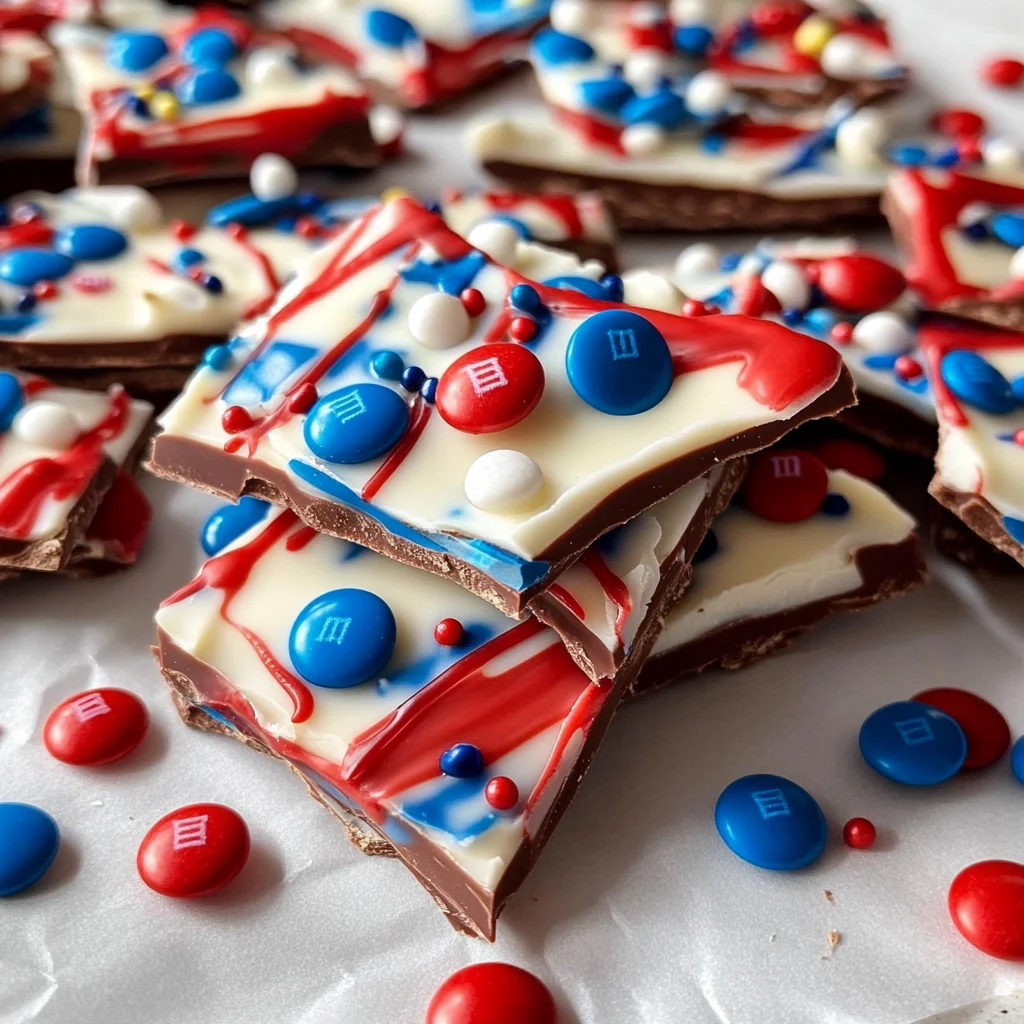
Enjoy this festive 4th of July Red, White & Blue Chocolate Bark, a vibrant dessert that shines at any patriotic celebration. This delightful treat features layers of smooth, melted semi-sweet and white chocolate, topped with colorful candy drizzles and sprinkles. Not only is it visually stunning, but it’s also incredibly easy to make, making it a perfect addition to barbecues, picnics, or family gatherings.

Jump to:
- Why You’ll Love This Recipe
- Tools and Preparation
- Essential Tools and Equipment
- Importance of Each Tool
- Ingredients
- For the Chocolate Layers
- For the Colorful Candy Drizzles
- For Toppings
- How to Make 4th of July Red, White & Blue Chocolate Bark
- Step 1: Prepare Your Baking Tray
- Step 2: Melt the Semi-Sweet Chocolate
- Step 3: Spread the Semi-Sweet Layer
- Step 4: Melt the White Chocolate
- Step 5: Add the White Chocolate Layer
- Step 6: Melt Candy Melts
- Step 7: Drizzle Colors Over White Chocolate
- Step 8: Add Toppings
- Step 9: Hardening Process
- Step 10: Break Into Pieces
- How to Serve 4th of July Red, White & Blue Chocolate Bark
- Individual Treats
- Dessert Platter
- Ice Cream Topping
- Party Favors
- How to Perfect 4th of July Red, White & Blue Chocolate Bark
- Best Side Dishes for 4th of July Red, White & Blue Chocolate Bark
- Common Mistakes to Avoid
- Storage & Reheating Instructions
- Refrigerator Storage
- Freezing 4th of July Red, White & Blue Chocolate Bark
- Reheating 4th of July Red, White & Blue Chocolate Bark
- Frequently Asked Questions
- How do I customize my 4th of July Red, White & Blue Chocolate Bark?
- Can I use different types of chocolate?
- Is this dessert suitable for gluten-free diets?
- How long does it take to make 4th of July Red, White & Blue Chocolate Bark?
- Can I make this ahead of time?
- Final Thoughts
- 📖 Recipe Card
Why You’ll Love This Recipe
- Simple Preparation: This recipe comes together quickly with minimal steps, perfect for both novice and experienced bakers.
- Eye-Catching Colors: The vibrant red, white, and blue colors make it an attractive centerpiece for your 4th of July festivities.
- Versatile Treat: Enjoy it as a snack, dessert, or even as a fun activity with kids during holiday celebrations.
- Customizable Toppings: Feel free to get creative with different toppings like nuts or dried fruits to suit your taste.
- No Baking Required: Skip the oven and still impress your guests with this no-bake treat that’s sure to satisfy sweet cravings.
Tools and Preparation
To successfully create your 4th of July Red, White & Blue Chocolate Bark, you’ll need some essential tools. Having the right equipment will make the process smoother and more enjoyable.
Essential Tools and Equipment
- Parchment paper
- Microwave-safe bowls
- Spatula or spoon
- Baking tray
- Small piping bags (optional)
Importance of Each Tool
- Parchment paper: Prevents sticking and makes cleanup easy when removing the bark from the tray.
- Microwave-safe bowls: Ideal for melting chocolate without damaging it; ensures even heating for smooth results.
- Spatula or spoon: Perfect for spreading chocolate evenly on the tray for a beautiful finish.
Ingredients
For the Chocolate Layers
- 2 cups white chocolate morsels
- 2 cups semi-sweet chocolate morsels
For the Colorful Candy Drizzles
- 1/2 cup red candy melts
- 1/2 cup white candy melts
- 1/2 cup blue candy melts
For Toppings
- 1 tbsp red, white, and blue star sprinkles
- 1/4 cup red, white, and blue M&Ms
How to Make 4th of July Red, White & Blue Chocolate Bark
Step 1: Prepare Your Baking Tray
Begin by lining a baking tray with parchment paper. This will prevent your chocolate bark from sticking once it’s set.
Step 2: Melt the Semi-Sweet Chocolate
Melt Semi-Sweet Chocolate:
1. Place the semi-sweet chocolate morsels in a microwave-safe bowl.
2. Microwave in 30-second intervals, stirring in between until fully melted and smooth.
Step 3: Spread the Semi-Sweet Layer
Pour the melted semi-sweet chocolate onto your prepared tray. Use a spatula to spread it into an even layer. Allow this layer to harden completely; if you’re short on time, place it in the refrigerator.
Step 4: Melt the White Chocolate
Repeat the melting process with the white chocolate morsels in a separate bowl until smooth.
Step 5: Add the White Chocolate Layer
Once melted, pour the white chocolate over the hardened semi-sweet layer. Let this white layer harden completely before moving on to decorating.
Step 6: Melt Candy Melts
Melt each color of candy melts (red, white, blue) separately using the same microwave method.
Step 7: Drizzle Colors Over White Chocolate
Using small piping bags or a spoon:
1. Drizzle each color over the hardened white chocolate layer.
2. Work quickly so you can swirl them together before they set.
Step 8: Add Toppings
Sprinkle red, white, and blue star sprinkles along with M&Ms over the top while everything is still slightly soft so they adhere well.
Step 9: Hardening Process
Allow all layers to harden completely at room temperature or refrigerate if needed faster.
Step 10: Break Into Pieces
Once fully set, lift your delicious bark out using parchment paper edges and break it into pieces by hand.
Now you’re ready to serve your stunning 4th of July Red, White & Blue Chocolate Bark! Store any leftovers in an airtight container at room temperature or refrigerate for later enjoyment.
How to Serve 4th of July Red, White & Blue Chocolate Bark
Serving your 4th of July Red, White & Blue Chocolate Bark is a delightful way to celebrate. This colorful treat can be enjoyed in various ways that enhance its festive appeal and flavor.
Individual Treats
- Cut the chocolate bark into small squares or rectangles for easy serving. Each piece showcases the vibrant colors and makes for a perfect grab-and-go dessert.
Dessert Platter
- Arrange pieces of chocolate bark on a festive platter alongside other patriotic treats. Adding fruits like strawberries or blueberries can create a beautiful and cohesive theme.
Ice Cream Topping
- Crumble the chocolate bark over vanilla or strawberry ice cream. The mix of textures from the smooth ice cream and crunchy bark will delight your guests.
Party Favors
- Package individual pieces of chocolate bark in clear bags tied with red, white, and blue ribbons. This makes for a charming take-home treat for your guests.
How to Perfect 4th of July Red, White & Blue Chocolate Bark
Creating the perfect 4th of July Red, White & Blue Chocolate Bark involves attention to detail. Follow these tips to ensure success with your dessert.
- Use high-quality chocolate: Opting for premium semi-sweet and white chocolate morsels will elevate the flavor of your bark significantly.
- Ensure even melting: Melt your chocolate in short bursts in the microwave, stirring well each time. This prevents burning and helps achieve a smooth consistency.
- Work quickly: When layering chocolates and drizzling candy melts, work swiftly before they begin to set. This helps maintain the vibrant look.
- Customize toppings: Feel free to substitute M&Ms with other candies or nuts for added texture and flavor.
- Chill for quicker setting: If you’re short on time, place your layered bark in the refrigerator to speed up the hardening process.
Best Side Dishes for 4th of July Red, White & Blue Chocolate Bark
Pairing side dishes with your festive dessert can make your celebration even more enjoyable. Here are some delightful options that complement the colorful chocolate bark perfectly.
- Grilled Corn on the Cob: Freshly grilled corn brushed with butter and sprinkled with salt provides a sweet contrast to the rich chocolate.
- Caprese Salad Skewers: Cherry tomatoes, fresh basil, and mozzarella balls on skewers create a refreshing bite that balances sweetness.
- Fruit Salad: A mix of seasonal berries like strawberries, blueberries, and raspberries adds a burst of freshness that pairs well with dessert.
- Patriotic Pasta Salad: Use red bell peppers and blue cheese crumbles mixed with pasta for a colorful side that ties into the theme.
- Veggie Platter with Dip: Fresh vegetables served with ranch or hummus offer crunch and healthiness amidst sweet treats.
- Potato Salad: Creamy potato salad brings comfort food vibes that complement lighter desserts like chocolate bark.
- Coleslaw: A tangy coleslaw adds crunch and acidity that contrasts beautifully with the sweetness of desserts.
- Watermelon Slices: Juicy watermelon wedges are hydrating and refreshing, making them an ideal side dish for summer gatherings.
Common Mistakes to Avoid
Making 4th of July Red, White & Blue Chocolate Bark can be simple, but there are a few common pitfalls to watch out for.
- Skipping the Parchment Paper: Not lining your baking tray can lead to a sticky mess. Always use parchment paper to make removing the bark easy.
- Overheating Chocolate: Melting chocolate too quickly can cause it to seize up. Use short bursts in the microwave and stir frequently.
- Not Allowing Layers to Set: Rushing through the setting process can cause layers to mix. Make sure each layer is completely hardened before adding the next.
- Ignoring Decoration Timing: Adding sprinkles or M&Ms too late means they won’t stick well. Decorate while the top layer is still slightly soft.
- Cutting Too Soon: If you try to break the bark before it’s fully set, you’ll end up with uneven pieces. Be patient and wait for it to harden completely.
Storage & Reheating Instructions
Refrigerator Storage
- Store your chocolate bark in an airtight container.
- It will last up to 2 weeks in the refrigerator.
Freezing 4th of July Red, White & Blue Chocolate Bark
- Wrap each piece tightly in plastic wrap before placing them in a freezer-safe container.
- The bark can be frozen for up to 3 months.
Reheating 4th of July Red, White & Blue Chocolate Bark
- Oven: Preheat your oven to low heat (around 200°F). Place the bark on a baking sheet for a few minutes until warm.
- Microwave: Heat on low power in 10-second intervals until just softened. Avoid overheating.
- Stovetop: Place in a heat-safe bowl over simmering water, stirring until warmed through.
Frequently Asked Questions
Here are some common questions about making 4th of July Red, White & Blue Chocolate Bark.
How do I customize my 4th of July Red, White & Blue Chocolate Bark?
You can add different toppings like nuts or dried fruits! Feel free to experiment with color combinations as well.
Can I use different types of chocolate?
Yes! You can substitute dark chocolate or even milk chocolate for a sweeter flavor profile.
Is this dessert suitable for gluten-free diets?
Yes! The ingredients used in this recipe are naturally gluten-free, making it perfect for gluten-sensitive guests.
How long does it take to make 4th of July Red, White & Blue Chocolate Bark?
The total time is about 1 hour and 42 minutes, including setting time for each layer.
Can I make this ahead of time?
Absolutely! You can prepare this treat up to several days in advance and store it properly until serving.
Final Thoughts
The 4th of July Red, White & Blue Chocolate Bark is an appealing and festive dessert that brings joy to any gathering. Its vibrant colors and delicious flavors make it perfect for summer celebrations. Feel free to customize the toppings and create your own variations!
Did You Enjoy Making This Recipe? Please rate this recipe with ⭐⭐⭐⭐⭐ or leave a comment.
📖 Recipe Card
Print
4th of July Red, White & Blue Chocolate Bark
- Total Time: 30 minutes
- Yield: Approximately 16 servings 1x
Description
Celebrate your summer gatherings with our vibrant 4th of July Red, White & Blue Chocolate Bark. This no-bake dessert is not only visually stunning but also incredibly easy to make—perfect for barbecues, picnics, or family celebrations. Featuring layers of smooth semi-sweet and white chocolate, it’s topped with colorful candy melts and festive sprinkles for a delightful treat that will impress guests of all ages. With its customizable toppings and eye-catching colors, this chocolate bark is sure to become a favorite at your holiday festivities.
Ingredients
- 2 cups white chocolate morsels
- 2 cups semi-sweet chocolate morsels
- 1/2 cup red candy melts
- 1/2 cup white candy melts
- 1/2 cup blue candy melts
- 1 tbsp red, white, and blue star sprinkles
- 1/4 cup red, white, and blue M&Ms
Instructions
- Line a baking tray with parchment paper.
- Melt semi-sweet chocolate in the microwave until smooth; pour onto the prepared tray and spread evenly. Let it set.
- Melt white chocolate separately and pour over the hardened semi-sweet layer; let it set.
- Melt red, white, and blue candy melts individually.
- Drizzle melted candy colors over the white chocolate layer.
- Sprinkle with star sprinkles and M&Ms while still soft.
- Allow to harden completely before breaking into pieces.
- Prep Time: 20 minutes
- Cook Time: 10 minutes
- Category: Dessert
- Method: No-bake
- Cuisine: American
Nutrition
- Serving Size: 1 piece (30g)
- Calories: 150
- Sugar: 15g
- Sodium: 15mg
- Fat: 8g
- Saturated Fat: 5g
- Unsaturated Fat: 3g
- Trans Fat: 0g
- Carbohydrates: 18g
- Fiber: 0g
- Protein: 1g
- Cholesterol: 0mg