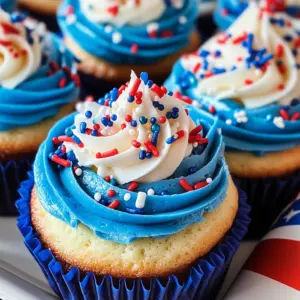
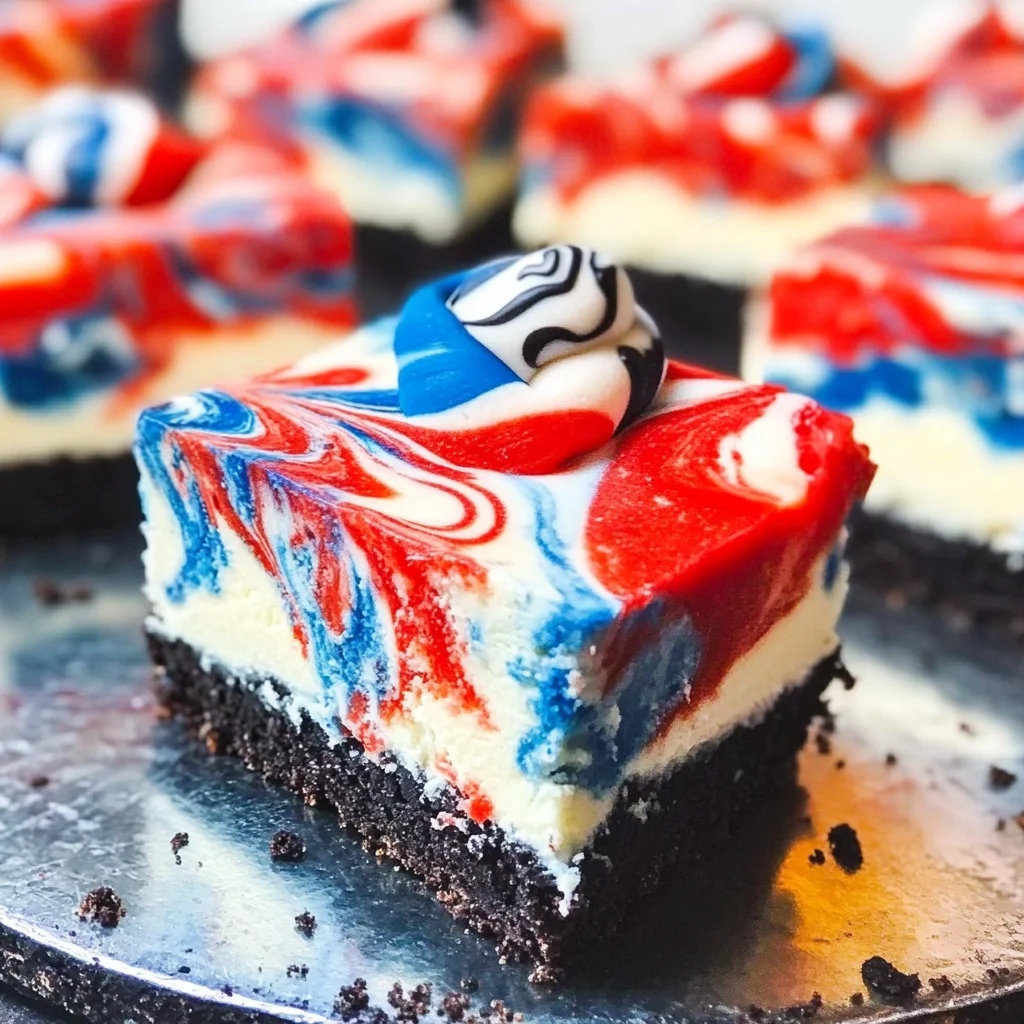
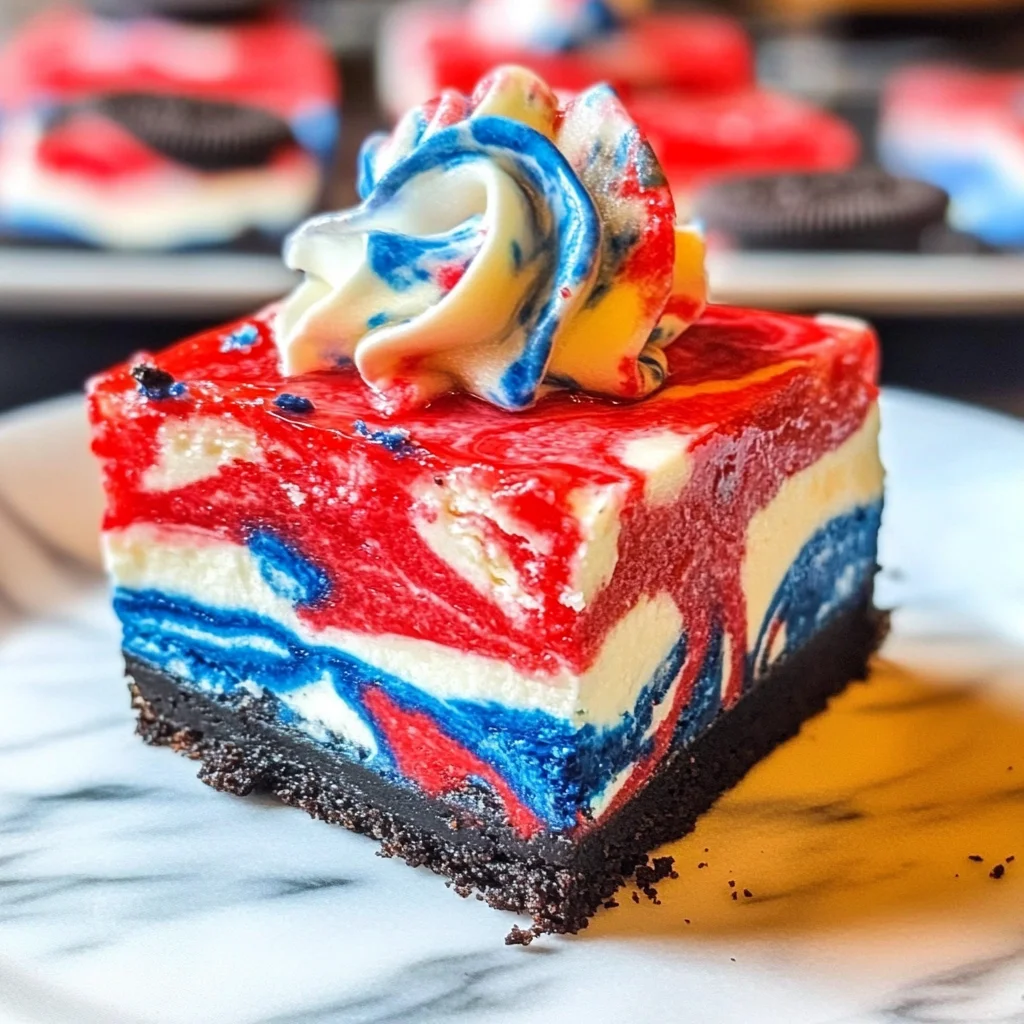
Swirls of colors make these Red White and Blue Cheesecake Bars a fun dessert to share at holiday BBQs. This super simple red, white, and blue dessert is sure to brighten your Memorial Day and 4th of July picnics.

Jump to:
- Why You’ll Love This Recipe
- Tools and Preparation
- Essential Tools and Equipment
- Importance of Each Tool
- Ingredients
- For the Crust
- For the Filling
- How to Make Red White and Blue Cheesecake Bars Recipe
- Step 1: Preheat the Oven
- Step 2: Prepare the Cookie Crust
- Step 3: Set Up Water Bath
- Step 4: Make the Cheesecake Filling
- Step 5: Color the Batter
- Step 6: Assemble the Layers
- Step 7: Bake
- Step 8: Cool and Refrigerate
- Step 9: Serve
- How to Serve Red White and Blue Cheesecake Bars Recipe
- Individual Portions
- Topped with Whipped Cream
- Fresh Berries
- Ice Cream Pairing
- Colorful Sprinkles
- Festive Plates
- How to Perfect Red White and Blue Cheesecake Bars Recipe
- Best Side Dishes for Red White and Blue Cheesecake Bars Recipe
- Common Mistakes to Avoid
- Storage & Reheating Instructions
- Refrigerator Storage
- Freezing Red White and Blue Cheesecake Bars Recipe
- Reheating Red White and Blue Cheesecake Bars Recipe
- Frequently Asked Questions
- How do I achieve perfect swirls?
- Can I use different colors for my cheesecake bars?
- What if my cheesecake cracks during baking?
- How long do these cheesecake bars need to chill?
- Final Thoughts
- 📖 Recipe Card
Why You’ll Love This Recipe
- Festive Presentation: The vibrant colors create a stunning visual appeal that will impress your guests.
- Easy to Prepare: Simple instructions mean you can whip this up without stress, perfect for busy holiday celebrations.
- Deliciously Creamy: The rich cream cheese filling combined with the Oreo crust makes for a delightful flavor experience.
- Perfect for Any Occasion: While ideal for summer holidays, these bars are great for gatherings year-round.
- Make Ahead Friendly: They can be prepared in advance, allowing you to enjoy your time with friends and family.
Tools and Preparation
Gathering the right tools is crucial for making your Red White and Blue Cheesecake Bars successful. With these essential items, you’ll ensure a smooth baking process.
Essential Tools and Equipment
- Food processor
- Mixing bowls
- Electric mixer
- 9×13 inch baking pan
- Measuring cups and spoons
Importance of Each Tool
- Food processor: Quickly crushes cookies into fine crumbs, saving time on prep work.
- Electric mixer: Ensures a perfectly creamy texture by thoroughly blending the cheesecake filling.
- 9×13 inch baking pan: Provides ample space for even baking and easy serving of these delicious bars.
Ingredients
For the Crust
- 30 Oreo cookies
- 4 Tablespoons unsalted butter, melted
For the Filling
- 3 – 8 ounce packages cream cheese, softened
- 1 1/2 cups granulated sugar
- 1/4 cup sour cream
- 2 teaspoons vanilla extract
- 1/4 cup all-purpose flour
- 3 large eggs
- red & blue gel food colors
How to Make Red White and Blue Cheesecake Bars Recipe
Step 1: Preheat the Oven
Preheat the oven to 325 degrees Fahrenheit. Line a 9×13 inch baking pan with foil for easy removal later.
Step 2: Prepare the Cookie Crust
- Place the Oreo cookies, cream included, in a food processor.
- Pulse until you achieve fine crumbs.
- Stir in the melted butter until evenly mixed.
- Press this mixture firmly into the bottom of the prepared pan.
- Bake for 10 minutes, then remove from the oven and allow to cool.
Step 3: Set Up Water Bath
Place a large baking sheet on the bottom rack of the oven. Fill it halfway with water to create steam while baking, which helps prevent cracking.
Step 4: Make the Cheesecake Filling
- In a mixing bowl, beat together the softened cream cheese and granulated sugar until creamy.
- Add in the sour cream, vanilla extract, and flour. Mix well until combined.
- Incorporate the eggs, beating gently just until they are blended into the mixture.
Step 5: Color the Batter
- Divide the cheesecake batter evenly into three bowls.
- Use red gel food coloring in one bowl and blue gel food coloring in another bowl to tint two of them.
Step 6: Assemble the Layers
- Spoon alternating dollops of each color over the cooled crust in the pan.
- Use a butter knife to swirl through the batter gently; do not over mix as you want distinct colors.
Step 7: Bake
Place the cheesecake pan above the water-filled baking sheet in your preheated oven. Bake for about 45-50 minutes or until set.
Step 8: Cool and Refrigerate
Once done, remove from oven immediately and place on a wire rack to cool for about an hour. Then refrigerate for at least 4-6 hours before cutting into squares.
Step 9: Serve
Cut into squares and serve with whipped cream and sprinkles if desired! Enjoy your festive treat!
How to Serve Red White and Blue Cheesecake Bars Recipe
These vibrant Red White and Blue Cheesecake Bars are perfect for celebrations and gatherings. They not only taste fantastic but also add a festive touch to your dessert table. Here are some delightful serving suggestions to elevate your experience.
Individual Portions
- Use cupcake liners to create individual servings, making it easy for guests to grab their own slice.
Topped with Whipped Cream
- A dollop of whipped cream on top enhances the creamy texture and adds a lightness to each bite.
Fresh Berries
- Garnish each square with fresh strawberries or blueberries for added flavor and a decorative touch.
Ice Cream Pairing
- Serve alongside a scoop of vanilla or strawberry ice cream for a delightful contrast in temperature and flavor.
Colorful Sprinkles
- Add colorful sprinkles on top to create an even more festive look, perfect for holiday celebrations.
Festive Plates
- Present the cheesecake bars on themed plates that match your holiday decor, enhancing the visual appeal at your gathering.
How to Perfect Red White and Blue Cheesecake Bars Recipe
Creating the perfect Red White and Blue Cheesecake Bars requires attention to detail. Here are some tips to ensure your dessert turns out beautifully every time.
Use Room Temperature Ingredients: Ensure the cream cheese, eggs, and sour cream are at room temperature for a smooth batter.
Don’t Overmix: Mix the batter just until combined after adding the eggs. Overmixing can lead to cracks during baking.
Create Water Bath: Baking in a water bath helps maintain moisture and prevents cracking in your cheesecake bars.
Cool Gradually: Let the cheesecake cool at room temperature before refrigerating. This helps set the texture properly without sudden temperature changes.
Chill Before Slicing: Refrigerate the cheesecake bars for at least 4-6 hours before slicing for clean cuts and better flavor development.
Store Properly: Keep leftovers in an airtight container in the refrigerator for up to 5 days to maintain freshness.
Best Side Dishes for Red White and Blue Cheesecake Bars Recipe
Pairing side dishes with your Red White and Blue Cheesecake Bars can make your meal even more enjoyable. Here are some excellent options that complement this dessert well.
Grilled Chicken Skewers: Marinate chicken in herbs and spices, then grill them for a savory contrast to sweet cheesecake bars.
Caprese Salad: Fresh mozzarella, tomatoes, and basil drizzled with balsamic glaze provide a refreshing balance.
Veggie Platter: A selection of fresh vegetables served with hummus offers crunchiness that pairs well with creamy desserts.
Fruit Salad: A mix of seasonal fruits can cleanse the palate between bites of rich cheesecake bars while enhancing flavors.
Potato Salad: A classic side dish that is filling, providing a hearty complement to lighter desserts like cheesecake bars.
Corn on the Cob: Grilled or boiled corn seasoned with butter makes for a delicious summer side that pairs well with any dessert.
Coleslaw: Crunchy coleslaw adds texture and tanginess that nicely offsets the sweetness of the cheesecake bars.
Pasta Salad: A light pasta salad with veggies can serve as an excellent side dish, bringing color and freshness to your picnic spread.
Common Mistakes to Avoid
When making your Red White and Blue Cheesecake Bars, it’s important to avoid common pitfalls that can affect the outcome.
- Boldly skip the cooling step: Allowing the cheesecake to cool before refrigerating is key for the texture. Skipping this can lead to a soupy consistency.
- Boldly overmix the batter: Mixing too much can cause air bubbles, leading to cracks during baking. Mix just until combined for a smooth finish.
- Boldly ignore oven temperature: An incorrect oven temperature can ruin your bars. Always preheat your oven properly and use an oven thermometer for accuracy.
- Boldly neglecting to line the pan: Not lining your pan with foil can make it difficult to remove the cheesecake bars. Always line it to ensure easy removal and clean-up.
- Boldly using old ingredients: Fresh ingredients make a big difference in taste. Always check the expiration dates on cream cheese and other dairy products.
Storage & Reheating Instructions
Refrigerator Storage
- Store leftover cheesecake bars in an airtight container.
- They will last up to 5 days in the refrigerator.
Freezing Red White and Blue Cheesecake Bars Recipe
- Wrap each individual bar tightly in plastic wrap and then place them in a freezer-safe bag.
- These can be frozen for up to 3 months.
Reheating Red White and Blue Cheesecake Bars Recipe
- Oven: Preheat to 325°F (160°C) and warm the bars for about 10-15 minutes until slightly softened.
- Microwave: Heat on medium power for 15-20 seconds, checking frequently to avoid overheating.
- Stovetop: Place bars in a pan over low heat, cover, and warm gently for 5-7 minutes.
Frequently Asked Questions
Here are some common questions about making Red White and Blue Cheesecake Bars.
How do I achieve perfect swirls?
To get beautiful swirls, alternate spoonfuls of colored batter over the crust and gently drag a knife through without overmixing.
Can I use different colors for my cheesecake bars?
Absolutely! Feel free to experiment with your favorite colors of gel food coloring for any occasion.
What if my cheesecake cracks during baking?
Cracking can occur due to overmixing or rapid temperature changes. Ensure you don’t overmix and bake with a water bath for even cooking.
How long do these cheesecake bars need to chill?
The bars should chill in the refrigerator for at least 4-6 hours after cooling on the counter.
Final Thoughts
These Red White and Blue Cheesecake Bars are not only visually stunning but also delicious. Perfect for summer celebrations like Memorial Day or Independence Day, they offer great versatility with flavor customization options. Try adding fruit toppings or different color combinations to make them truly yours!
Did You Enjoy Making This Recipe? Please rate this recipe with ⭐⭐⭐⭐⭐ or leave a comment.
📖 Recipe Card
Print
Red White and Blue Cheesecake Bars
- Total Time: 1 hour 10 minutes
- Yield: Approximately 12 servings 1x
Description
These Red White and Blue Cheesecake Bars are the perfect festive treat for summer gatherings and holiday celebrations. With their vibrant colors and creamy texture, they will surely be the star of your dessert table. This easy-to-make dessert combines a crunchy Oreo crust with a luscious cream cheese filling, beautifully swirled in patriotic hues of red and blue. Ideal for Memorial Day picnics or the Fourth of July, these cheesecake bars are not only delightful in taste but also visually stunning. Prepare them ahead of time to enjoy more moments with family and friends during your festivities!
Ingredients
- 30 Oreo cookies
- 4 tablespoons unsalted butter, melted
- 3 (8 oz) packages cream cheese, softened
- 1 1/2 cups granulated sugar
- 1/4 cup sour cream
- 2 teaspoons vanilla extract
- 1/4 cup all-purpose flour
- 3 large eggs
- Red & blue gel food colors
Instructions
- Preheat the oven to 325°F (165°C) and line a 9×13 inch baking pan with foil.
- In a food processor, crush the Oreo cookies into fine crumbs. Mix in melted butter and press firmly into the bottom of the prepared pan. Bake for 10 minutes and let cool.
- Set up a water bath by placing a large baking sheet filled halfway with water on the bottom rack of the oven.
- In a mixing bowl, beat softened cream cheese and granulated sugar until creamy. Mix in sour cream, vanilla extract, and flour until combined. Add eggs one at a time, mixing gently.
- Divide batter into three bowls; tint two bowls with red and blue gel food coloring.
- Spoon alternating dollops of each color over the cooled crust and swirl gently with a knife.
- Bake above the water bath for 45-50 minutes until set. Cool for one hour before refrigerating for at least 4-6 hours.
- Cut into squares, serve with whipped cream or fresh berries if desired.
- Prep Time: 20 minutes
- Cook Time: 50 minutes
- Category: Dessert
- Method: Baking
- Cuisine: American
Nutrition
- Serving Size: 1 square (100g)
- Calories: 300
- Sugar: 22g
- Sodium: 210mg
- Fat: 20g
- Saturated Fat: 10g
- Unsaturated Fat: 8g
- Trans Fat: 0g
- Carbohydrates: 28g
- Fiber: 1g
- Protein: 5g
- Cholesterol: 70mg